Sunday 29 April 2012
Answers To Introduction To Algorithms 1.2-2 and 1.2-3
Algorithm is a fun subject and we are starting from the very basics of algorithm. Here is my solution for selected questions from chapter 1 of Introduction To Algorithms by Cormen and others.
1.2-2) Suppose we are comparing implementations of insertion sort and merge sort on the same machine. For inputs of size n, insertion sort runs in 8n2 steps, while merge sort runs in 64nlg n steps. For which values of n does insertion sort beat merge sort?
Here, we need to determine the value of n such that 8n2 = 64nlgn
For the value n = 1, obviously the merge sort beats the insertion sort so we will start from 2 and find the higher limit up to which the insertion sort beats merge sort.
The above equation can be further reduced as n = 8lgn. We can now solve it to determine the value of n. A simple code in C that would do the job for us is as below:
Answer: 2 <= n < 44. 1.2-3) What is the smallest value of n such that an algorithm whose running time is 100n2 runs faster than an algorithm whose running time is 2n on the same machine?
Here, we need to determine the smallest value of n such that 100n2 < 2n. The value of n evaluates to 15. The source code for above problem is as below:
I hope this helps some of the algo beginners out there trying to solve the questions from "Introduction To Algorithms". Btw, they are basic maths however :P
Read more...
1.2-2) Suppose we are comparing implementations of insertion sort and merge sort on the same machine. For inputs of size n, insertion sort runs in 8n2 steps, while merge sort runs in 64nlg n steps. For which values of n does insertion sort beat merge sort?
Here, we need to determine the value of n such that 8n2 = 64nlgn
For the value n = 1, obviously the merge sort beats the insertion sort so we will start from 2 and find the higher limit up to which the insertion sort beats merge sort.
The above equation can be further reduced as n = 8lgn. We can now solve it to determine the value of n. A simple code in C that would do the job for us is as below:
#include <stdio.h>
#include <math.h>

int main()
{
 int i = 2;
 while (1)
 {
  int merge = 8 * log2(i);
  if (i > merge)
  {
   printf("Value of i: %d\n", i);
   break;
  }
  i++;
 }
 return 0;
}
Answer: 2 <= n < 44. 1.2-3) What is the smallest value of n such that an algorithm whose running time is 100n2 runs faster than an algorithm whose running time is 2n on the same machine?
Here, we need to determine the smallest value of n such that 100n2 < 2n. The value of n evaluates to 15. The source code for above problem is as below:
#include <stdio.h>
#include <math.h>

int main()
{
 int i = 2;
 while (1)
 {
  int x = 100 * pow(i, 2);
  int y = pow(2,i);
  if (x < y)
  {
   printf("Value of i: %d\n", i);
   break;
  }
  i++;
 }
 return 0;
}
I hope this helps some of the algo beginners out there trying to solve the questions from "Introduction To Algorithms". Btw, they are basic maths however :P
Read more...
Bookmark this post: | 
|
Torrentz Offers Advanced Search Features[In Case You Didn't Know]
Until recently, I didn't know that my favorite torrent meta-search engine, Torrentz.eu, offered few advanced search features that makes it easier to spot the file we are searching for. After all, who would ever check the help page to read about a torrent meta-search engine but I would consider myself a noob for not thinking that advanced search are implemented in today's torrent meta-search engines.
Anyway, directly taken from the help page, below are the examples that can be used for making better search in Torrentz while searching for the files.
I've been finding these advanced searches useful since I discovered them. I hope you will also find them useful. ;)
Read more...
Anyway, directly taken from the help page, below are the examples that can be used for making better search in Torrentz while searching for the files.
Mozilla Firefox - search for Mozilla and Firefox anywhere in the title
"Mozilla Firefox" - search exactly for "Mozilla Firefox"
Mozilla | Linux - search for Mozilla or Linux
Mozilla Firefox -beta - search for Mozilla AND Firefox but NOT beta
^Mozilla - search for titles starting with Mozilla
movie* - match movie, movies or any other prefix - This is enabled by default on most queries
filename:Fedora iso - deep search inside torrent for file named Fedora iso
filename:Fedora size:3520802816 - deep search inside torrent for file named Fedora iso with size of 3520802816 bytes
Linux added: 7d - search for Linux added within the last 7 days - you can also use h for hours
I've been finding these advanced searches useful since I discovered them. I hope you will also find them useful. ;)
Read more...
Bookmark this post: |
|
Monday 9 April 2012
Email Obfuscation Tricks In The Age Of Spammers
Every day thousands of spam emails are propelled to our e-mail addresses and the algorithms used by the spam bots are increasingly getting sophisticated and are able to harvest few kinds of obfuscated e-mail addresses already. While this race between spammers and web users goes on, we can still use several of the obfuscation tricks either to prevent bots from harvesting the emails or to fool bots to pick completely wrong e-mail adresses. Here, I am going to illustrate some useful obfuscation tricks I've come across over.
A very basic way of obfuscating emails is by replacing the characters such as @ and . with at and dot. Following are few samples:
And, below are some examples that would be nearly impossible to harvest :P. Just be more creative with them and no automated spam bot/email harvester out there will be able to get you :D. However, this might possibly create some kind of DoS like scenario for many legitimate users.
The unicode version:
samar@techgaun.com
will properly show as:
samar@techgaun.com
you can specify the following CSS property to use this obfuscation trick.
Edit: I found this link with some good examples so I thought I would rather refer you all to this webpage.
Read more...
The Very Basics
A very basic way of obfuscating emails is by replacing the characters such as @ and . with at and dot. Following are few samples:
samar[at]techgaun[dot]com
samar (at) techgaun (dot) com
samar (at) techgaun (dot) com
And, below are some examples that would be nearly impossible to harvest :P. Just be more creative with them and no automated spam bot/email harvester out there will be able to get you :D. However, this might possibly create some kind of DoS like scenario for many legitimate users.
<myfirstname> (at) techgaun (dot) com
<myfirstname> (at) <lastname> (dot) com
<myfirstname> (at) <lastname> (dot) com
Using Image
Another method is to create a small and appropriate image that will display your e-mail address. Should be more than enough, so just create a PNG/GIF of your e-mail address.Text Encodings
You could perform text encodings and javascript obfuscations, etc. An example of this is using ascii to unicode conversion and applying other level of obfuscations again to it.The unicode version:
samar@techgaun.com
will properly show as:
samar@techgaun.com
Obfuscations using CSS
Reverse Text Direction
CSS allows you to display the text in the reverse direction. For a HTML entity,<div class="email"> moc.nuaghcet@ramas</div>
you can specify the following CSS property to use this obfuscation trick.
.email
{
     unicode-bidi: bidi-override;
     direction: rtl;
     float: left;
}
Hidden Text Within E-mail address
Another method is to put some hidden html entity between the parts of e-mail address and then set its display style as none. The spam bots while trying to extract the data from such e-mail information are subjected to get wrong information. An example is:samar@tech<span class='display: none;'>nique</span>gaun.com
Edit: I found this link with some good examples so I thought I would rather refer you all to this webpage.
Read more...
Bookmark this post: |
|
Sunday 8 April 2012
Turning The Internet Upside Down - A Prank To Play
Probably one of the best modern day april fool prank that should be played by the network admins to their users, I came acrosss this cool little trick to turn the whole internet upside down and thought to share with you guys.
With a linux gateway and some pretty basic linux skills(in fact, everything is well explained in the webpage & hence doesn't require much of skills), you can turn the internet upside down. The official webpage shows how to configure everything to play prank on your wi-fi stealing neighbours.
Ubuntu help also includes a good HowTo.
Read more...
Bookmark this post: |
|
Saturday 7 April 2012
Sexy SSH Tricks For Linux Geeks
Previously I had posted on mounting filesystem over SSh and now its time for yet another post on cool SSh tricks.
So lets see few of the several SSH tricks that we either need to use or can use for fun and making stuffs easier.

Do not supply any passphrase and keep on pressing ENTER if you are looking for password-free SSH login. This will create two files id_dsa(private key) and id_dsa.pub(public key). All we have to do is copy the public key to the remote server computer and then add the content of public key to the list of authorized keys as below(or using nano or whatever you find easier):
You can even supply passphrase if you want and this will make authentication more secure. In that case, be sure to set the following value in /etc/ssh/sshd_config:
Similarly, we can encrypt the SSH sessions using one of the different available block ciphers: aes128-ctr,aes192-ctr,aes256-ctr,arcfour256,arcfour128,aes128-cbc,3des-cbc. IMHO, using aes256-ctr would be sufficiently secure due to 256 bits key size. Below is an example of using both the compression and encryption while establishing the SSH connection.
To prevent the last login status, simply change and set as following in the configuration file(/etc/ssh/sshd_config):
And also, change the content of the file /etc/motd and /var/run/motd which by default contains the banner message that is displayed by SSH.
So that's the end. Of course, there are more sexy SSH tricks which I'll cover up once I get some free time. Also, share what you have :)
Read more...
So lets see few of the several SSH tricks that we either need to use or can use for fun and making stuffs easier.

Password-less SSH
No matter how convinient it is to use SSH to connect to remote server, people tend to seek for more ease and typing passwords each time you are on interactive shell is something most users hate. Moreover, you can even prevent the bruteforcing attacks by using password-free SSH with small extra configuration change. First we need to generate a pair of keys by using the ssh-keygen tool. ssh-keygen generates, manages and converts authentication keys for ssh. ssh-keygen can create RSA keys for use by SSH protocol version 1 and DSA, ECDSA or RSA keys for use by SSH protocol version 2. In my example, I'll generate DSA keys as below:ssh-keygen -t dsa
Do not supply any passphrase and keep on pressing ENTER if you are looking for password-free SSH login. This will create two files id_dsa(private key) and id_dsa.pub(public key). All we have to do is copy the public key to the remote server computer and then add the content of public key to the list of authorized keys as below(or using nano or whatever you find easier):
cat id_dsa.pub >> ~/.ssh/authorized_keys
You can even supply passphrase if you want and this will make authentication more secure. In that case, be sure to set the following value in /etc/ssh/sshd_config:
PasswordAuthentication no
Mount Filesystem over SSH
This is another useful trick to use while working over SSH. The details on this can be read here.Copy File Over SSH Using SCP
SCP is a SSH based tool that provides an easy way to copy files over SSH. You can copy files from and to SSH server to/from your machine and also copy files from one server to another directly. Check my previous blog post on SCP for further details.Running Graphical Softwares Over SSH
With SSH, you can configure the X11 Forwarding(set to Yes in /etc/ssh/sshd_config for global effect and host-by-host basis in /etc/ssh/ssh_config by setting ForwardX11 yes) which allows us to run the graphical softwares on server over SSH. You can run the graphical softwares over SSH by supplying the -X switch while connecting to the server. An example is shown below:ssh -X samar@192.168.0.1 -p 222
Compressed and Encrypted SSH Sessions
Another good thing to do is compress and encrypt the SSH sessions. Compression is usually a very good idea for slow networks but is not desirable for faster networks where compression and de-compression might cause more overhead. The compression algorithm used by SSH is gzip and requests compression of all data (including stdin, stdout, stderr, and data for forwarded X11 and TCP connections). The default value can be set on a host-by-host basis in the configuration files(/etc/ssh/ssh_config) by setting the Compression option. To enable compression, use the -C switch while connecting to the remote SSH server or set the Compression yes in your config file.Similarly, we can encrypt the SSH sessions using one of the different available block ciphers: aes128-ctr,aes192-ctr,aes256-ctr,arcfour256,arcfour128,aes128-cbc,3des-cbc. IMHO, using aes256-ctr would be sufficiently secure due to 256 bits key size. Below is an example of using both the compression and encryption while establishing the SSH connection.
ssh -c aes256-ctr -C hostel@192.168.0.1
Disable Root Login
Its not a good thing to allow root login in SSH so be sure root login is disabled in your SSH server. This is done by setting the configuration(/etc/ssh/sshd_config) as PermitRootLogin no. What more? Disable the password-based logins and use the key-based login. And to keep script kiddies out, you could change the default port in the configuration.Disable Last Login & Default MOTD
By default, while logging in to the SSH servers like OpenSSH, we will see some kind of banner that includes a MOTD(Message Of The Day) and last login user and time. Disabling these or changing the banner requires two modifications.To prevent the last login status, simply change and set as following in the configuration file(/etc/ssh/sshd_config):
PrintMotd no
PrintLastLog no
PrintLastLog no
And also, change the content of the file /etc/motd and /var/run/motd which by default contains the banner message that is displayed by SSH.
So that's the end. Of course, there are more sexy SSH tricks which I'll cover up once I get some free time. Also, share what you have :)
Read more...
Bookmark this post: |
|
Thursday 5 April 2012
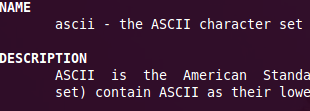
View ASCII Table In Your Linux Terminal
You need not be browsing some online ascii table website or need not download any document containing the list of ASCII characters if you are using linux OS. You can view the ASCII characters set encoded in octal, decimal, and hexadecimal by just opening the terminal.
In order to access the ASCII table, just type:
Isn't it cool to have all the ASCII character sets in your linux terminal?
Read more...
In order to access the ASCII table, just type:
samar@Techgaun:~$ man ascii

Isn't it cool to have all the ASCII character sets in your linux terminal?
Read more...
Bookmark this post: |
|
How To Mount Folder or Filesystem Over SSh
Many times you need to interact a lot with some directory or a filesystem while working remotely on a server over SSh. Things will be way easier if you can mount the remote folder or filesystem over SSh and I am going to show how to do this thing in this very post.
SSHFS (Secure SHell FileSystem) is a file system for Linux (and other operating systems with a FUSE implementation, such as Mac OS X or FreeBSD) capable of operating on files on a remote computer using just a secure shell login on the remote computer. On the local computer where the SSHFS is mounted, the implementation makes use of the FUSE (Filesystem in Userspace) kernel module. The practical effect of this is that the end user can seamlessly interact with remote files being securely served over SSH just as if they were local files on his/her computer. On the remote computer the SFTP subsystem of SSH is used.
SSHFS can be downloaded and installed from HERE. Most linux distros have sshfs in their repositories. You can use the respective package managers to install the sshfs in the client system(i.e. your system).
Ubuntu and debian users can type the following in the terminal to install sshfs:
Once you install sshfs, you are ready to mount the remote files and folders over SSh. The syntax for mounting the remote filesystem/folder is pretty straightforward.
The syntax is: sshfs -p SSHPort [user@]host:[dir] mountpoint
An example of mounting the remote system's /opt directory in my Desktop
Unmounting can be done by using the command as below:
I hope this counts as a useful tips for you. :)
Read more...
SSHFS (Secure SHell FileSystem) is a file system for Linux (and other operating systems with a FUSE implementation, such as Mac OS X or FreeBSD) capable of operating on files on a remote computer using just a secure shell login on the remote computer. On the local computer where the SSHFS is mounted, the implementation makes use of the FUSE (Filesystem in Userspace) kernel module. The practical effect of this is that the end user can seamlessly interact with remote files being securely served over SSH just as if they were local files on his/her computer. On the remote computer the SFTP subsystem of SSH is used.
SSHFS can be downloaded and installed from HERE. Most linux distros have sshfs in their repositories. You can use the respective package managers to install the sshfs in the client system(i.e. your system).
Ubuntu and debian users can type the following in the terminal to install sshfs:
samar@Techgaun:~$ sudo apt-get install sshfs
Once you install sshfs, you are ready to mount the remote files and folders over SSh. The syntax for mounting the remote filesystem/folder is pretty straightforward.
The syntax is: sshfs -p SSHPort [user@]host:[dir] mountpoint
An example of mounting the remote system's /opt directory in my Desktop
samar@Techgaun:~$ sshfs -p 222 kubh@192.168.0.1:/opt/ ~/Desktop/remote/
Unmounting can be done by using the command as below:
samar@Techgaun:~$ fusermount -u ~/Desktop/remote/
I hope this counts as a useful tips for you. :)
Read more...
Bookmark this post: |
|
Wednesday 4 April 2012
w3m - A Text Based Commandline Web Browser
w3m is a World Wide Web text based client. It will display hypertext markup language (HTML) documents containing links to files residing on the local system, as well as files residing on remote systems. It can display HTML tables and frames. In addition, it can be used as a "pager" in much the same manner as "more" or "less". Current versions of w3m run on Unix (Solaris, SunOS, HP-UX, Linux, FreeBSD, and EWS4800) and on Microsoft Windows 9x/NT.
Linux users can install the package from their respective repositories. Following is the example of installation in ubuntu and debian based linux.
Using the w3m browser is pretty straightforward. At start up, w3m will load any local file or remote URL specified at the command line. An example usage is as below:
You can see the whole list of available operation by pressing H(Shift + h) and you will know how comprehensive this seemingly simple command line browser actually is. w3m supports all kind of features we expect from a web browser such as hyperlink navigations, tabbed browsings, file I/O operations, bookmarking, and searching.
w3m can also be used as a pager and for translating HTML files. Taken directly from w3m manpage, following are the examples:
To use w3m as a pager:
To use w3m to translate HTML files:
or
Read more...
Linux users can install the package from their respective repositories. Following is the example of installation in ubuntu and debian based linux.
samar@Techgaun:~$ sudo apt-get install w3m
Using the w3m browser is pretty straightforward. At start up, w3m will load any local file or remote URL specified at the command line. An example usage is as below:
samar@Techgaun:~$ w3m http://www.techgaun.com
You can see the whole list of available operation by pressing H(Shift + h) and you will know how comprehensive this seemingly simple command line browser actually is. w3m supports all kind of features we expect from a web browser such as hyperlink navigations, tabbed browsings, file I/O operations, bookmarking, and searching.
w3m can also be used as a pager and for translating HTML files. Taken directly from w3m manpage, following are the examples:
To use w3m as a pager:
samar@Techgaun:~$ ls | w3m
To use w3m to translate HTML files:
samar@Techgaun:~$ cat foo.html | w3m -T text/html
or
samar@Techgaun:~$ cat foo.html | w3m -dump -T text/html >foo.txt
Read more...
Bookmark this post: |
|
Monday 2 April 2012
How To Disable Password Prompts For sudo In Ubuntu
If you are one of those linux users who very frequently use the sudo command, you might have been annoyed of entering passwords each time you use this command. However with a very simple tweak, you can change this behaviour and disable the password prompts for the sudo command.

A bit of warning though, do not modify the default behavior of asking for passwords since it would drastically compromise security of your system. Following is the warning given by ubuntu help.
If you disable the sudo password for your account, you will seriously compromise the security of your computer. Anyone sitting at your unattended, logged in account will have complete Root access, and remote exploits become much easier for malicious crackers.
Now you are aware of warning, lets see how this can be done.We need to edit the /etc/sudoers file. Lets first open the file in safe editable mode using the following command:
Using visudo for editing the /etc/sudoers lets us locate the possible errors that may occur while editing the file so always use visudo.
Following is the format of disabling password prompts for specific user.
So if we are to disable password prompts for the user samar, you can make a new line with following entry:
In case you want to let all the users with admin privilege use the sudo command without having to give the password, you can edit the line that says %admin ALL=(ALL) ALL to the following:
Once you add such line for appropriate user, press Ctrl + x and save the changes. You will either have to log out and login back or restart the shell to see the modification in effect.
I hope this is useful. :)
Read more...

A bit of warning though, do not modify the default behavior of asking for passwords since it would drastically compromise security of your system. Following is the warning given by ubuntu help.
If you disable the sudo password for your account, you will seriously compromise the security of your computer. Anyone sitting at your unattended, logged in account will have complete Root access, and remote exploits become much easier for malicious crackers.
Now you are aware of warning, lets see how this can be done.We need to edit the /etc/sudoers file. Lets first open the file in safe editable mode using the following command:
samar@Techgaun:~$ sudo visudo
Using visudo for editing the /etc/sudoers lets us locate the possible errors that may occur while editing the file so always use visudo.
Following is the format of disabling password prompts for specific user.
<username> ALL=NOPASSWD: ALL
So if we are to disable password prompts for the user samar, you can make a new line with following entry:
samar ALL=(ALL)NOPASSWD: ALL
In case you want to let all the users with admin privilege use the sudo command without having to give the password, you can edit the line that says %admin ALL=(ALL) ALL to the following:
%admin ALL=(ALL)NOPASSWD: ALL
Once you add such line for appropriate user, press Ctrl + x and save the changes. You will either have to log out and login back or restart the shell to see the modification in effect.
I hope this is useful. :)
Read more...
Bookmark this post: |
|
Subscribe to:
Posts (Atom)