Showing posts with label ubuntu 12.10. Show all posts
Showing posts with label ubuntu 12.10. Show all posts
Saturday 27 October 2012
Accelerate Your Softwares Update Speed Using Apt-fast
Long ago, I had posted about apt-fast script which used axel to create multiple HTTP connections and increase the download speed of software updates and packages. In this post, you will get the details for installing apt-fast from PPA.
apt-fast is a shellscript wrapper for apt-get and aptitude that can drastically improve apt download times by downloading packages in parallel, with multiple connections per package.
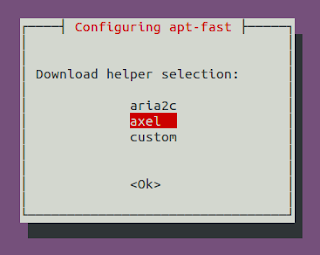
As a pre-requisite, we will first install axel, a simple yet very useful command line download accelerator. Alternatively, you can also use aria accelerator with apt-fast.
Then you will have to add a PPA for apt-fast, update the database, and install apt-fast.
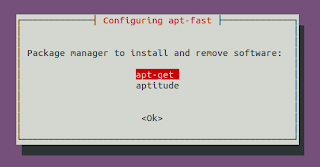
You need to configure few options afterwards as below:
For manual installation and grabbing the source code, check the GitHub.
Once you install apt-fast, you can install softwares and perform updates from the repos using the command below:
I hope this becomes useful :)
Read more...
As a pre-requisite, we will first install axel, a simple yet very useful command line download accelerator. Alternatively, you can also use aria accelerator with apt-fast.
samar@samar-Techgaun:~$ sudo apt-get install axel
Then you will have to add a PPA for apt-fast, update the database, and install apt-fast.
samar@samar-Techgaun:~$ sudo add-apt-repository ppa:apt-fast/stable
samar@samar-Techgaun:~$ sudo apt-get update
samar@samar-Techgaun:~$ sudo apt-get install apt-fast
You need to configure few options afterwards as below:


For manual installation and grabbing the source code, check the GitHub.
Once you install apt-fast, you can install softwares and perform updates from the repos using the command below:
samar@samar-Techgaun:~$ sudo apt-fast install package_name
I hope this becomes useful :)
Read more...
Bookmark this post: | 
|
Linux Cat Command Examples
The cat command displays the content of file on the standard output. If multiple files are specified, the contents of all files will be concatenated and then displayed on the standard output. Likewise, if no file is specified, it will assume standard input (keyboard input) as the input to the command. The Ctrl + d is the shortcut used to save the contents in the appropriate output placeholder specified and exit the cat command.
Print content of file in standard output
samar@samar-Techgaun:~$ cat workers.txt
List of workers, designations & salary (in K):
Kshitiz Director 30
Bikky Manager  20


Abhis Sweeper  10
Rajesh Guard  12
Print line numbers
samar@samar-Techgaun:~$ cat -n workers.txt
     1 List of workers, designations & salary (in K):
     2 Kshitiz Director 30
     3 Bikky Manager  20
     4
     5
     6 Abhis Sweeper  10
     7 Rajesh Guard  12
Print line numbers for non-empty lines only
samar@samar-Techgaun:~$ cat -b workers.txt
     1 List of workers, designations & salary (in K):
     2 Kshitiz Director 30
     3 Bikky Manager  20


     4 Abhis Sweeper  10
     5 Rajesh Guard  12
Create a new file
samar@samar-Techgaun:~$ cat > newfile.txt
We can create text files
using cat command
once u finish writing,
press ctrl+d to save file
^d
Display content of multiple files
samar@samar-Techgaun:~$ cat workers.txt newfile.txt
List of workers, designations & salary (in K):
Kshitiz Director 30
Bikky Manager  20


Abhis Sweeper  10
Rajesh Guard  12
We can create text files
using cat command
once u finish writing,
press ctrl+d to save file
Combine multiple files to new file
samar@samar-Techgaun:~$ cat workers.txt newfile.txt > concat.txt
samar@samar-Techgaun:~$ cat concat.txt
List of workers, designations & salary (in K):
Kshitiz Director 30
Bikky Manager  20


Abhis Sweeper  10
Rajesh Guard  12
We can create text files
using cat command
once u finish writing,
press ctrl+d to save file
Append data to existing file
samar@samar-Techgaun:~$ cat >> newfile.txt
New line added
^d
samar@samar-Techgaun:~$ cat newfile.txt
We can create text files
using cat command
once u finish writing,
press ctrl+d to save file
New line added
Alternatively, you can use the syntax below if you wish to create new file combining the content of already existing file and standard input.
samar@samar-Techgaun:~$ cat newfile.txt - > myfile
thanks for everything
^d
samar@samar-Techgaun:~$ cat myfile
We can create text files
using cat command
once u finish writing,
press ctrl+d to save file
New line added
thanks for everything
Another possibility is to combine two text files with data from standard input (keyboard) in-between the contents of these two text files.
samar@samar-Techgaun:~$ cat workers.txt - newfile.txt > myfile

----------------------------------

^d
samar@samar-Techgaun:~$ cat myfile
List of workers, designations & salary (in K):
Kshitiz Director 30
Bikky Manager  20


Abhis Sweeper  10
Rajesh Guard  12

----------------------------------

We can create text files
using cat command
once u finish writing,
press ctrl+d to save file
New line added
Display $ sign at the end of each line
samar@samar-Techgaun:~$ cat -E workers.txt
List of workers, designations & salary (in K):$
Kshitiz Director 30$
Bikky Manager  20$
$
$
Abhis Sweeper  10$
Rajesh Guard  12$
Display ^I sign instead of TABs
samar@samar-Techgaun:~$ cat -T workers.txt
List of workers, designations & salary (in K):
Kshitiz^IDirector^I30
Bikky^IManager^I^I20


Abhis^ISweeper^I^I10
Rajesh^IGuard^I^I12
Display files with non-printing characters
samar@samar-Techgaun:~$ cat -v /bin/nc
In the example above, the non-printing characters are replaced with ^ and M- notation except for line breaks and TABs. This can be used to display the contents of binary files which would otherwise have shown gibberish text all over the console.
Show contents with tabs, line breaks and non-printing characters
samar@samar-Techgaun:~$ cat -A /bin/nc
The tab will be substituted by ^I, line breaks with $ and non-printing characters with ^ and M- notation. Actually, the -A switch is equivalent to -vET switch.
Supress/squeeze repeated empty lines
samar@samar-Techgaun:~$ cat -s workers.txt
List of workers, designations & salary (in K):
Kshitiz Director 30
Bikky Manager  20

Abhis Sweeper  10
Rajesh Guard  12
Using -s switch, we can squeeze repeatedly occurring blank lines and replace all the adjacent empty lines with a single empty line in the output. This might be useful to reformat a file with several empty lines in-between (eg. cat -s workers.txt > formatted_workers.txt).
Display last line first
samar@samar-Techgaun:~$ tac workers.txt
Rajesh Guard  12
Abhis Sweeper  10

Bikky Manager  20
Kshitiz Director 30
List of workers, designations & salary (in K):
It is the tac, not the cat that is doing the magic but just thought that this is the right place to make a note about this little known command.
Edit: Added here-doc examples. Thanks rho dai for pointing me this.
Parameter substitution using here-document strings
samar@samar-Techgaun:~$ cat > test << TEST
samar@samar-Techgaun:~$ I am $USER. My home is $HOME
samar@samar-Techgaun:~$ I came here from $OLDPWD
samar@samar-Techgaun:~$ TEST
samar@samar-Techgaun:~$ cat test
I am samar. My home is /home/samar
I came here from /home/samar/Downloads
Command expansion example
samar@samar-Techgaun:~$ cat > test << TEST
samar@samar-Techgaun:~$ $(ls /)
samar@samar-Techgaun:~$ TEST
samar@samar-Techgaun:~$ cat test
bin
boot
cdrom
dev
etc
home
initrd.img
initrd.img.old
lib
lost+found
media
mnt
opt
proc
root
run
sbin
selinux
srv
sys
tmp
usr
var
vmlinuz
vmlinuz.old
Parameter substitution turned off
samar@samar-Techgaun:~$ cat > test << 'TEST'
samar@samar-Techgaun:~$ I am $USER. My home is $HOME
samar@samar-Techgaun:~$ I came here from $OLDPWD
samar@samar-Techgaun:~$ TEST
samar@samar-Techgaun:~$ cat test
I am $USER. My home is $HOME
I came here from $OLDPWD
Note the difference between the last example and previous two examples. Enclosing the limit string TEST with quotes prevents the substitutions and expansions.
I hope these examples are useful. :)
Read more...
Bookmark this post: |
|
Monday 22 October 2012
Ubuntu Tweak Development Will Continue
Three days ago, Ubuntu Tweak developer Tualatrix had posted a blog post mentioning that the Ubuntu Tweak will no longer be developed but he has now changed his mind and has decided to continue the development because of support he received.
The developer writes
You made me know that Ubuntu Tweak is still valuable, and as the first software project I made 5 years ago, it is just like my baby, I don’t really want to give up the development.
and thanks all the good people who left the message for him and forked the app in github.
The blog post also mentions
Back to 5 years ago, I developed it just because of my practice on Linux programming, I felt freedom when I make things on Linux (Although I didn’t have developing experience on Windows and Mac then). But now I don’t feel any freedom about developing this software any more. The initial motivation is changed, and I’m still looking for new motivation.
Overall, he is not too satisfied with his current overload for working on this personal project while still managing time for his job and personal life.
Anyway, Ubuntu Tweak 0.8.1 is out and you can download from PPA.
PPA DEB link
Release Notes
Read more...
Bookmark this post: |
|
Tuesday 16 October 2012
Practical ls Command Examples For Fun & Profit
The power of linux lies in the shell through which we can perform complex job in no time. While the directory listing command 'ls' seems to be very simple command, the linux shell provides the power to use switches and pipes to do anything from terminal. Check out this list with practically useful examples using ls.
Any more example that fires up in your mind? Feel free to share over here ;)
Read more...
Display all files including hidden files/folders
ls -a
Display one file/folder per line
ls -1
Count number of files & folders
ls -1 | wc -l
Human readable file sizes (eg. Mb or Gb)
ls -lh
Alphabetically sort the listing
ls -X
Only list the folders in current directory
ls -d */
ls -p | grep /
ls -p | grep /
Display folders in current directory consisting certain patterns
ls -l D* | grep :$
ls -l *a* | grep :$
ls -l *a* | grep :$
List files by descending order of modification time
ls -lt
ls -l --sort=time #alternative long version
ls -l --sort=time #alternative long version
List files by descending order of creation time
ls -lct
List files in reverse order
ls -ltr
ls -l --sort=time --reverse #alternative long version
ls -l --sort=time --reverse #alternative long version
List files in descending order of file size
ls -lSh
ls -lh --sort=size
ls -lSh1 *.avi #find largest AVI file
rm `ls -S1 | head -1` #delete largest file in current folder
ls -lh --sort=size
ls -lSh1 *.avi #find largest AVI file
rm `ls -S1 | head -1` #delete largest file in current folder
List files in ascending order of file size
ls -lShr
ls -lh --sort=size --reverse #alternative long version
ls -lh --sort=size --reverse #alternative long version
Display directories in recursive manner
ls -R
Display the files/folders created today
ls -l --time-style=+%F | grep `date +%F`
Display the files/folders created this year
ls -l --time-style=+%y | grep `date +%y`
Any more example that fires up in your mind? Feel free to share over here ;)
Read more...
Bookmark this post: |
|
Saturday 13 October 2012
Empty Trash From Command Line In Ubuntu
CLI is such a sexy piece so why bother using GUI, even for cleaning up your trash. In this post, you will see how you can empty trash in Ubuntu from command line.
The trash you see in GUI is nothing but just the view for the files deleted by users which are temporarily moved to the special location of user's home directory. For any user, the trash location is ~/.local/share/Trash/. That is, whatever a user deletes gets saved in this location.
I hope this becomes useful :)
Read more...
The trash you see in GUI is nothing but just the view for the files deleted by users which are temporarily moved to the special location of user's home directory. For any user, the trash location is ~/.local/share/Trash/. That is, whatever a user deletes gets saved in this location.
samar@samar-Techgaun:~$ rm -rf ~/.local/share/Trash/
I hope this becomes useful :)
Read more...
Bookmark this post: |
|
Enable Fingerprint Authentication In Ubuntu
So you got fingerprint reader in your device but have not been able to use it under ubuntu? Follow this How To to enable fingerprint authentication in ubuntu using the Fingerprint GUI from fingerprints reader integration team.
First make sure your fingerprint hardware is supported. You can check for the vendor and device ID by entering the following command:
This link provides the list of the supported fingerprint readers.
Installation is easy. Fire up the terminal and enter the following commands:
You will have to restart the system or log out the session and login back to use and configure the fingerprint GUI.
Press Alt + F2 and type fingerprint-gui. From this GUI, you can configure and enroll your fingerprints.

Read more...
First make sure your fingerprint hardware is supported. You can check for the vendor and device ID by entering the following command:
samar@TG:~$ lsusb | grep -i finger | awk -F " " '{print $6}'
138a:0005
138a:0005
Installation is easy. Fire up the terminal and enter the following commands:
sudo add-apt-repository ppa:fingerprint/fingerprint-gui
sudo apt-get update
sudo apt-get install libbsapi policykit-1-fingerprint-gui fingerprint-gui
sudo apt-get update
sudo apt-get install libbsapi policykit-1-fingerprint-gui fingerprint-gui
You will have to restart the system or log out the session and login back to use and configure the fingerprint GUI.
Press Alt + F2 and type fingerprint-gui. From this GUI, you can configure and enroll your fingerprints.

Read more...
Bookmark this post: |
|
Friday 28 September 2012
Ubuntu 12.10 Beta 2 Released
The ubuntu developers have just released the Beta 2 of Ubuntu 12.10 Quantal Quetzal which gives the preview of the next version of ubuntu. The final ubuntu 12.10 release is scheduled for 18th October this year.
The Beta 2 release is intended to give the preview of how the final release of Quantal Quetzal will be like. The previous beta 1 release was released on 6th September.

As always, Ubuntu has chosen the Quetzal as codename for Ubuntu 12.10. According to Wikipedia, Quetzals are strikingly colored birds in the trogon family. They are found in forests and woodlands, especially in humid highlands, with the five species from the genus Pharomachrus being exclusively Neotropical, while the single Euptilotis species is almost entirely restricted to western Mexico.
Like we heard earlier, Ubuntu 12.10 releases are no longer available as Live CD.
Download Quantal Quetzal 12.10 Beta 2 Release
Read more...
Bookmark this post: |
|
Subscribe to:
Posts (Atom)