Friday 28 June 2013
Rename MySQL root User [How To]
MySQL ships with the default user 'root' who has all kind of access to the MySQL database. We often wish to rename this user to something else because of maybe security issues or any other reason. While renaming 'root' to something else is not going to alleviate all sorts of security problems that may arise, it is good idea to rename 'root' to some other name.
Login to the MySQL console and then type the following SQL statements:
It is often good idea to drop anonymous users and the test database because of security reasons. I bet you are never going to use that test database so why keep it? Run the SQL statements as below to do so:
Also, make sure you use strong passwords. You can use mysqladmin to change passwords.
The later two commands are to ensure that no log of any of your MySQL queries or admin level commands have been stored in the history.
I hope this helps :)
Read more...
Login to the MySQL console and then type the following SQL statements:
mysql> use mysql;
mysql> update user set user="some_other_user" where user="root";
mysql> flush privileges;
mysql> update user set user="some_other_user" where user="root";
mysql> flush privileges;
It is often good idea to drop anonymous users and the test database because of security reasons. I bet you are never going to use that test database so why keep it? Run the SQL statements as below to do so:
mysql> drop user "";
mysql> drop database test;
mysql> drop database test;
Also, make sure you use strong passwords. You can use mysqladmin to change passwords.
$ mysqladmin -u my_new_user -p password 's0m3_r4nd0m_$|r0ng_p455'
$ history -c
$ rm ~/.mysql_history
The later two commands are to ensure that no log of any of your MySQL queries or admin level commands have been stored in the history.
I hope this helps :)
Read more...
Bookmark this post: | 
|
Thursday 27 June 2013
Manual Sun Java Installation In Linux
Be it be multiple installations of java or be it be custom server, you might run into the necessity of manually installing java. This tutorial will provide step by step commands for installing java manually in linux.
Though the process was done on CentOS, it should work for most linux systems with or without slightest modifications. The process below installs Sun Java and configures Sun Java to be the default java to be used. Below are the steps I took to install and configure java in my system:
If you wish to reconfigure the default java, you can run alternatives as below & choose the appropriate option:
I hope this helps :)
Read more...
Though the process was done on CentOS, it should work for most linux systems with or without slightest modifications. The process below installs Sun Java and configures Sun Java to be the default java to be used. Below are the steps I took to install and configure java in my system:
$ cd /opt/java
$ wget http://download.oracle.com/otn-pub/java/jdk/6u45-b15/jdk-6u45-linux-i586.tar.gz
$ tar xvfz jdk-6u45-linux-i586.tar.gz
$ echo 'export JAVA_HOME=/opt/java/jdk1.6.0_45' > /etc/profile.d/sun-jdk.sh
$ echo 'export PATH=$JAVA_HOME/bin:$PATH' >> /etc/profile.d/sun-jdk.sh
$ alternatives --install /usr/bin/java java /opt/java/jdk1.6.0_45/bin/java 2
$ java -version
java version "1.6.0_45"
Java(TM) SE Runtime Environment (build 1.6.0_45-b06)
Java HotSpot(TM) 64-Bit Server VM (build 20.45-b01, mixed mode)
If you wish to reconfigure the default java, you can run alternatives as below & choose the appropriate option:
$ alternatives --config java
Read more...
Bookmark this post: |
|
Friday 21 June 2013
Share Local Directory With Remote Server During RDP Session
Well I have to constantly rdesktop to the remote servers at my workstation and sometimes I have to copy files and folders from my local machine. This post will provide you the steps on how to share files and folders with remote server during rdp session.
Normally, your RDP session would start with the following command:
But we wish to do something extra i.e. we need to share our directory with the remote server. The good news is that the rdesktop command supports device redirection using a -r flag which can be repeated.
Your command would look something like below:
You can then access your share as a drive or media. I hope this helps :)
Read more...
$ rdesktop -g90% your_server
But we wish to do something extra i.e. we need to share our directory with the remote server. The good news is that the rdesktop command supports device redirection using a -r flag which can be repeated.
Your command would look something like below:
$ rdesktop -g90% -r disk:share=/home/samar/scripts myserver
You can then access your share as a drive or media. I hope this helps :)
Read more...
Bookmark this post: |
|
Wednesday 19 June 2013
Customizing Jenkins Layout
We use jenkins as our continuous integration server at our workplace and without any doubt, its the best CI tool I've used. We had been thinking of customizing jenkins layout to fit our company and thanks to the plugins developed by people who make jenkins not just another random tool on the internet, but the software WITH awesome community.
There are particularly two plugins that seemed to fit our scenario. The first one is Simple Theme Plugin and the second one is Page Markup Plugin.
The later one does allow to add markups to the page but didn't best fit for our scenario. So we decided to use the Simple Theme Plugin. Installing the plugin is straightforward in jenkins. Once the Simple Theme Plugin is installed, a new content box will appear in your Manage Jenkins -> Configure System which will look something like below:

This plugin requires you to specify your own custom .css and .js file. The good thing about jenkins is you can place your own content at the JENKINS_INSTALL_DIR/userContent/ directory and then access it via http://yourbuildserver.tld/jenkins_path/userConent/yourfile.ext. I was working on the windows system where my jenkins install was at C:\.jenkins\ and hence I placed my CSS and image files inside the userContent directory of jenkins install folder. This should not be very difficult on any other systems if you are familiar with jenkins and your OS.
You can grab the jenkins css files from the webapp root directory (I was using tomcat so I grabbed it from inside there) and then edit the css as per your necessity. In my case, I had to change the header style only so my CSS looked something like below:
This is all you have to do. Btw, don't fall for the readme.txt inside userContent directory which says: "Files in this directory will be served under your http://server/jenkins/userContent/". Make sure you specify the URL according to your server configuration not according to this specification thus appending "/jenkins" in your URL.
Read more...
The later one does allow to add markups to the page but didn't best fit for our scenario. So we decided to use the Simple Theme Plugin. Installing the plugin is straightforward in jenkins. Once the Simple Theme Plugin is installed, a new content box will appear in your Manage Jenkins -> Configure System which will look something like below:

This plugin requires you to specify your own custom .css and .js file. The good thing about jenkins is you can place your own content at the JENKINS_INSTALL_DIR/userContent/ directory and then access it via http://yourbuildserver.tld/jenkins_path/userConent/yourfile.ext. I was working on the windows system where my jenkins install was at C:\.jenkins\ and hence I placed my CSS and image files inside the userContent directory of jenkins install folder. This should not be very difficult on any other systems if you are familiar with jenkins and your OS.
You can grab the jenkins css files from the webapp root directory (I was using tomcat so I grabbed it from inside there) and then edit the css as per your necessity. In my case, I had to change the header style only so my CSS looked something like below:
#top-panel {
  background-size:100% 100%;
  height: 43px;
  }

#top-panel td#login-field span a {
    background: none; }

#top-panel a {
    background: url("title.png") 0 0 no-repeat;
    display: block;
    width: 107px;
    height: 27px;
    margin: 10px 0 -5px 0px; }
#top-panel td > a img {
      display: none; }
This is all you have to do. Btw, don't fall for the readme.txt inside userContent directory which says: "Files in this directory will be served under your http://server/jenkins/userContent/". Make sure you specify the URL according to your server configuration not according to this specification thus appending "/jenkins" in your URL.
Read more...
Bookmark this post: |
|
Tuesday 18 June 2013
Setting Installation Of Android Application To SD Card
Well this is old stuff and several applications with much more functionalities are probably out in the play store but just decided to post it here because it proved useful while playing with older android OS.
Follow the steps below to enable installation of new softwares to the SD card on the android phones by default (Tested on android 2.2).
Note: "get pmInstallLocation" can be used to query for the available locations you can install softwares to.
That's all. Hope it helps :)
Read more...
Follow the steps below to enable installation of new softwares to the SD card on the android phones by default (Tested on android 2.2).
- Enable USB debugging on phone (from somewhere in Settings->About Phone)
- Connect device with PC using USB cable
- Open command prompt/terminal
- Open android debugger bridge (change directory to the location where android sdk is installed)
- Type: adb.exe devices
- Type: adb.exe shell
- On the new console, type: set pmInstallLocation 2
Here, 2 means External memory
Note: "get pmInstallLocation" can be used to query for the available locations you can install softwares to.
That's all. Hope it helps :)
Read more...
Bookmark this post: |
|
Wednesday 12 June 2013
Simple Pie Chart Implementation In Turbo C
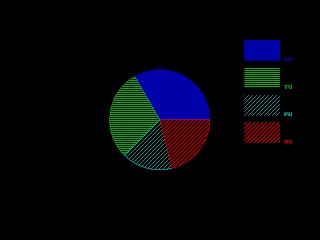
This is a very simple implementation of pie chart in Turbo C. The source code is quite easy to read through so must not be the big problem understanding the code.
This implementation makes use of pieslice() function which draws and fills the pie slice with centre x, y and radius r. The function also requires the start angle and end angle.
Below is the screenshot for sample run:
Read more...
This implementation makes use of pieslice() function which draws and fills the pie slice with centre x, y and radius r. The function also requires the start angle and end angle.
#include <stdio.h>
#include <conio.h>
#include <graphics.h>
#include <math.h>

#define MAX 20
#define X_CENTRE getmaxx()/2
#define Y_CENTRE getmaxy()/2
#define RADIUS 100

struct pie_data
{
 char desc[100];
 int freq;
 int color;
 int style;
 float angle;
};

int main()
{
 struct pie_data data[MAX];
 int gd = DETECT, gm;
 int i, j, k, n, total_freq = 0, start_angle = 0, end_angle = 0, xmax, ystart = 80, yend;
 printf("Enter the number of items: ");
 scanf("%d", &n);

 for (i = 0, j = 1, k = 1; i < n; i++)
 {
  printf("Enter the item title: ");
  scanf("%s", data[i].desc);
  printf("Enter the item frequency: ");
  scanf("%d", &data[i].freq);
  total_freq += data[i].freq;
  data[i].color = j;
  data[i].style = k;
  if (j++ >= 13) j = 1;
  if (k++ >= 11) k = 1;
 }

 for (i = 0; i < n; i++)
 {
  float angle;
  data[i].angle = 360 * (data[i].freq /(float) total_freq);
 }

 initgraph(&gd, &gm, "C:\\TurboC3\\BGI");
 xmax = getmaxx() - 150;
 setaspectratio(10000, 10000);
 for (i = 0; i < n; i++)
 {
  end_angle = start_angle + data[i].angle;
  setcolor(data[i].color);
  setfillstyle(data[i].style, data[i].color);
  pieslice(X_CENTRE, Y_CENTRE, (int)start_angle, (int)end_angle, RADIUS);
  start_angle = end_angle;
  yend = ystart + 40;
  bar(xmax, ystart, xmax + 70, yend);
  ystart = yend + 15;
  outtextxy(xmax + 80, ystart - 20, data[i].desc);
 }
 getch();
 closegraph();
 return 0;
}
Below is the screenshot for sample run:

Read more...
Bookmark this post: |
|
Tuesday 11 June 2013
Congratulation To SLC Graduates From Iris Academy
Today, result of SLC exam 2069 was published and the first batch of Iris Academy secured 100% result with 50% distinction. Although being a relatively new school in Makar-2, Chisapani, Nawalparasi, Iris Academy secured the best result in the area.
We would like to congratulate all the SLC appeared students and the Iris Academy and wish for the bright future ahead.
We would like to congratulate all the SLC appeared students and the Iris Academy and wish for the bright future ahead.
Read more...
Bookmark this post: |
|
Subscribe to:
Posts (Atom)