Showing posts with label fedora. Show all posts
Showing posts with label fedora. Show all posts
Sunday 8 June 2014
Postgresql Backup To Amazon S3 On OpenShift Origin
To move forward, you need to backup. Backing up your production data is critical and with Postgresql, you can backup WAL (Write Ahead Log) archives and this post gives you steps to accomplish for backing up postgresql WALs to Amazon S3 on your OpenShift Origin using WAL-E.
WAL-E is a great tool that simplifies backup of postgresql by performing continuous archiving of PostgreSQL WAL files and base backups. Enough blabbering, you can reach out technical docs on how WAL works. I'll just mention series of commands and steps necessary for sending WAL archives to AWS S3 bucket.
On the node containing application with postgresql cartridge, run the following commands:
Then, edit the postgresql configuration file so as to turn on wal archiving. You need to find the right container for your postgresql in /var/lib/openshift (Its quite trivial if you know OpenShift basics).
Finally, you need to ensure that you are taking base backups periodically which can be achieved by utilizing cron cartridge. Clone the repo, add the following file and push to the application.
Make sure you use the OPENSHIFT_POSTGRESQL_DIR env-var or some other env-var that does not have two forward slashes adjacently since WAL-E hates it.
This should help you keep your data backed up regularly and you can enjoy beers.
Read more...
WAL-E is a great tool that simplifies backup of postgresql by performing continuous archiving of PostgreSQL WAL files and base backups. Enough blabbering, you can reach out technical docs on how WAL works. I'll just mention series of commands and steps necessary for sending WAL archives to AWS S3 bucket.
On the node containing application with postgresql cartridge, run the following commands:
$ yum install python-pip lzop pv
$ rpm -Uvh ftp://ftp.pbone.net/mirror/ftp5.gwdg.de/pub/opensuse/repositories/home:/p_conrad:/branches/Fedora_19/x86_64/daemontools-0.76-3.1.x86_64.rpm
$ pip install wal-e
$ umask u=rwx,g=rx,o=
$ mkdir -p /etc/wal-e.d/env
$ echo "secret-key-content" > /etc/wal-e.d/env/AWS_SECRET_ACCESS_KEY
$ echo "access-key" > /etc/wal-e.d/env/AWS_ACCESS_KEY_ID
$ echo 's3://backup/production/pgsql' > \
  /etc/wal-e.d/env/WALE_S3_PREFIX
$ chmod -R 765 /etc/wal-e.d/
Then, edit the postgresql configuration file so as to turn on wal archiving. You need to find the right container for your postgresql in /var/lib/openshift (Its quite trivial if you know OpenShift basics).
$ vi YOUR_OO_CONTAINER/postgresql/data/postgresql.conf
wal_level = archive # hot_standby in 9.0 is also acceptable
archive_mode = on
archive_command = 'envdir /etc/wal-e.d/env wal-e wal-push %p'
archive_timeout = 60
archive_mode = on
archive_command = 'envdir /etc/wal-e.d/env wal-e wal-push %p'
archive_timeout = 60
Finally, you need to ensure that you are taking base backups periodically which can be achieved by utilizing cron cartridge. Clone the repo, add the following file and push to the application.
$ vi .openshift/cron/daily/postgres-backup
#!/bin/bash

if [ $OPENSHIFT_POSTGRESQL_DIR ]; then
        /usr/bin/envdir /etc/wal-e.d/env /bin/wal-e backup-push ${OPENSHIFT_POSTGRESQL_DIR}data
fi

$ git add .openshift/cron/daily/postgres-backup
$ git commit -m "Added pg cron script"
$ git push origin master
Make sure you use the OPENSHIFT_POSTGRESQL_DIR env-var or some other env-var that does not have two forward slashes adjacently since WAL-E hates it.
This should help you keep your data backed up regularly and you can enjoy beers.
Read more...
Bookmark this post: | 
|
Thursday 5 June 2014
Setting Up JVM Heap Size In JBoss OpenShift Origin
Openshift is an awesome technology and have fell in love with it recently. In this post, I will talk about how we can set JVM Heap Size for your application using Jboss cartridge.
If you look into the content of the standalone.conf located at $OPENSHIFT_JBOSSEAP_DIR/bin, you can see that JVM_HEAP_RATIO is set to 0.5 if it is not already set.
And, later this ratio is used to calculate the max_heap so as to inject the maximum heap size in jboss java process. You can see how gear memory size is used to calculate the value of heap size. This is the very reason why the default installation allocates half of total gear memory size.
OpenShift keeps its number of environment variables inside /var/lib/openshift/OPENSHIFT_GEAR_UUID/.env so what I did was SSH to my OO node and run the command below (you should replace your gear's UUID):
Alternatively, rhc set-env JVM_HEAP_RATIO=0.7 -a appName should also work but I have not tried it.
Read more...
If you look into the content of the standalone.conf located at $OPENSHIFT_JBOSSEAP_DIR/bin, you can see that JVM_HEAP_RATIO is set to 0.5 if it is not already set.
if [ -z "$JVM_HEAP_RATIO" ]; then
        JVM_HEAP_RATIO=0.5
And, later this ratio is used to calculate the max_heap so as to inject the maximum heap size in jboss java process. You can see how gear memory size is used to calculate the value of heap size. This is the very reason why the default installation allocates half of total gear memory size.
max_memory_mb=${OPENSHIFT_GEAR_MEMORY_MB}
max_heap=$( echo "$max_memory_mb * $JVM_HEAP_RATIO" | bc | awk '{print int($1+0.5)}')
OpenShift keeps its number of environment variables inside /var/lib/openshift/OPENSHIFT_GEAR_UUID/.env so what I did was SSH to my OO node and run the command below (you should replace your gear's UUID):
$ echo -n 0.7 > /var/lib/openshift/52e8d31bfa7c355caf000039/.env/JVM_HEAP_RATIO
Alternatively, rhc set-env JVM_HEAP_RATIO=0.7 -a appName should also work but I have not tried it.
Read more...
Bookmark this post: |
|
Friday 11 April 2014
Patching Your OpenShift Origin Against Heartbleed vulnerability
Recently the heartbleed bug was exposed which existed in all the services that used OpenSSL 1.0.1 through 1.0.1f (inclusive) for years already. This weakness allows stealing the information protected, under normal conditions, by the SSL/TLS encryption used to secure the Internet by reading the memory of the system without need of any kind of access.
I've been administering OpenShift applications recently and this post outlines the measures I took to secure the OpenShift applications from this critical vulnerability.
In order to check if you are vulnerable or not, you can either check OpenSSL version:
Alternatively, you can use one of the online tools or the offline python tool to check if you are vulnerable or not.
Note that in case of OpenShift origin, you will have to update the OpenSSL package in brokers and nodes such that all the OpenShift apps are secure.
Once completed, verify the installation of patched version:
We'll have to restart the proxy systems (node-proxy) for the nodes for the effect of the patch. In fact, we will have to restart all the services that use the vulnerable OpenSSL versions.
I hope this helps :)
Read more...
I've been administering OpenShift applications recently and this post outlines the measures I took to secure the OpenShift applications from this critical vulnerability.
In order to check if you are vulnerable or not, you can either check OpenSSL version:
# openssl version -a
OpenSSL 1.0.1e-fips 11 Feb 2013
built on: Wed Jan 8 07:20:55 UTC 2014
platform: linux-x86_64
OpenSSL 1.0.1e-fips 11 Feb 2013
built on: Wed Jan 8 07:20:55 UTC 2014
platform: linux-x86_64
Alternatively, you can use one of the online tools or the offline python tool to check if you are vulnerable or not.
Note that in case of OpenShift origin, you will have to update the OpenSSL package in brokers and nodes such that all the OpenShift apps are secure.
# yum install -y openssl
Once completed, verify the installation of patched version:
# openssl version -a
OpenSSL 1.0.1e-fips 11 Feb 2013
built on: Tue Apr 8 00:29:11 UTC 2014
platform: linux-x86_64
# rpm -q --changelog openssl | grep CVE-2014-0160
- pull in upstream patch for CVE-2014-0160
OpenSSL 1.0.1e-fips 11 Feb 2013
built on: Tue Apr 8 00:29:11 UTC 2014
platform: linux-x86_64
# rpm -q --changelog openssl | grep CVE-2014-0160
- pull in upstream patch for CVE-2014-0160
We'll have to restart the proxy systems (node-proxy) for the nodes for the effect of the patch. In fact, we will have to restart all the services that use the vulnerable OpenSSL versions.
# systemctl restart openshift-node-web-proxy.service
# /bin/systemctl reload httpd.service
# /bin/systemctl reload httpd.service
I hope this helps :)
Read more...
Bookmark this post: |
|
Monday 18 November 2013
Install HTTrack On CentOS
Since I could not find the rpm in the repo, here is the quick How To to install HTTrack website copier on CentOS.
This should do all. If you wish not to install zlib compression support, you can skip the first step and run the configure as ./configure --without-zlib. I hope this helps :)
Read more...
$ yum install zlib-devel
$ wget http://download.httrack.com/cserv.php3?File=httrack.tar.gz -O httrack.tar.gz
$ tar xvfz httrack.tar.gz
$ cd httrack-3.47.27
$ ./configure
$ make && sudo make install
$ wget http://download.httrack.com/cserv.php3?File=httrack.tar.gz -O httrack.tar.gz
$ tar xvfz httrack.tar.gz
$ cd httrack-3.47.27
$ ./configure
$ make && sudo make install
This should do all. If you wish not to install zlib compression support, you can skip the first step and run the configure as ./configure --without-zlib. I hope this helps :)
Read more...
Bookmark this post: |
|
Thursday 27 June 2013
Manual Sun Java Installation In Linux
Be it be multiple installations of java or be it be custom server, you might run into the necessity of manually installing java. This tutorial will provide step by step commands for installing java manually in linux.
Though the process was done on CentOS, it should work for most linux systems with or without slightest modifications. The process below installs Sun Java and configures Sun Java to be the default java to be used. Below are the steps I took to install and configure java in my system:
If you wish to reconfigure the default java, you can run alternatives as below & choose the appropriate option:
I hope this helps :)
Read more...
Though the process was done on CentOS, it should work for most linux systems with or without slightest modifications. The process below installs Sun Java and configures Sun Java to be the default java to be used. Below are the steps I took to install and configure java in my system:
$ cd /opt/java
$ wget http://download.oracle.com/otn-pub/java/jdk/6u45-b15/jdk-6u45-linux-i586.tar.gz
$ tar xvfz jdk-6u45-linux-i586.tar.gz
$ echo 'export JAVA_HOME=/opt/java/jdk1.6.0_45' > /etc/profile.d/sun-jdk.sh
$ echo 'export PATH=$JAVA_HOME/bin:$PATH' >> /etc/profile.d/sun-jdk.sh
$ alternatives --install /usr/bin/java java /opt/java/jdk1.6.0_45/bin/java 2
$ java -version
java version "1.6.0_45"
Java(TM) SE Runtime Environment (build 1.6.0_45-b06)
Java HotSpot(TM) 64-Bit Server VM (build 20.45-b01, mixed mode)
If you wish to reconfigure the default java, you can run alternatives as below & choose the appropriate option:
$ alternatives --config java
Read more...
Bookmark this post: |
|
Friday 23 November 2012
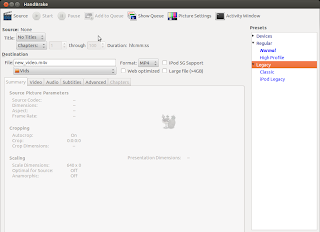
Video Transcoding With HandBrake In Linux
HandBrake is a GPL-licensed, multiplatform, multithreaded video transcoder available for major platforms: linux, mac, and windows. HandBrake converts video from nearly any format to a handful of modern ones.

Handbrake can save output in two containers, MP4 and MKV and I've been using it as a MKV transcoder for a while and I'm quite satisfied with it. Even though the official wiki says its not a ripper, I can see it to be quite useful DVD ripper.
Handbrake is available in CLI (HandBrakeCLI) and GUI (ghb) mode. Hence this offers the flexibility to choose the appropriate version according to your linux personality. As of now, we can install HandBrake from PPA and the latest version is v. 0.9.8 released back in July this year.
HandBrake can be installed from PPA. Issue the following commands in your terminal
Or if you wish to install the GUI version, type:
I recommend using the CLI version since you can transcode/convert videos much more efficiently if you use the CLI version. But if you are not comfortable with the command line interfaces, the GUI version of HandBrake is also quite good.
Only problem I have felt is the naming convention of the commands for both the GUI and CLI versions of the tool. In order to run two versions of this tool, you need to type HandBrakeCLI for CLI version and ghb for the GUI version. The problem here is with the naming convention for the binaries. I mean, the names handbrake-cli and handbrake-gtk would be more straightforward than these badly chosen names. Otherwise, the tool does pretty good job of video conversion and can be good alternative if you are not comfortable with ffmpeg. Note that ffmpeg is also capable of video conversions of different formats and is a great tool. :)
Read more...
Handbrake can save output in two containers, MP4 and MKV and I've been using it as a MKV transcoder for a while and I'm quite satisfied with it. Even though the official wiki says its not a ripper, I can see it to be quite useful DVD ripper.
Handbrake is available in CLI (HandBrakeCLI) and GUI (ghb) mode. Hence this offers the flexibility to choose the appropriate version according to your linux personality. As of now, we can install HandBrake from PPA and the latest version is v. 0.9.8 released back in July this year.
HandBrake can be installed from PPA. Issue the following commands in your terminal
$ sudo add-apt-repository ppa:stebbins/handbrake-releases
$ sudo apt-get update
$ sudo apt-get install handbrake-cli
$ sudo apt-get update
$ sudo apt-get install handbrake-cli
Or if you wish to install the GUI version, type:
$ sudo apt-get install handbrake-gtk
I recommend using the CLI version since you can transcode/convert videos much more efficiently if you use the CLI version. But if you are not comfortable with the command line interfaces, the GUI version of HandBrake is also quite good.

Only problem I have felt is the naming convention of the commands for both the GUI and CLI versions of the tool. In order to run two versions of this tool, you need to type HandBrakeCLI for CLI version and ghb for the GUI version. The problem here is with the naming convention for the binaries. I mean, the names handbrake-cli and handbrake-gtk would be more straightforward than these badly chosen names. Otherwise, the tool does pretty good job of video conversion and can be good alternative if you are not comfortable with ffmpeg. Note that ffmpeg is also capable of video conversions of different formats and is a great tool. :)
Read more...
Bookmark this post: |
|
Saturday 3 November 2012
Make Your Linux Read Papers For You
Fed up of reading text files and PDF papers? Is you eye power degrading day by day and can't hold even few minutes on screen? Don't worry, you can easily make your linux system speak and read all those papers for you.
There are several text to speech tools available for linux but in this post, I will be using festival, a Text-to-speech (TTS) tool written in C++. Also, Ubuntu and its derivation are most likely to include by default espeak, a multi-lingual software speech synthesizer.
For ubuntu and debian based system, type the following to install festival:
Moreover, you can also install a pidgin plugin that uses festival:
For now, you just need to install festival. Once you have installed festival, you can make it read text files for you. If you go through the online manual of festival, it says:
"Festival works in two fundamental modes, command mode and text-to-speech mode (tts-mode). In command mode, information (in files or through standard input) is treated as commands and is interpreted by a Scheme interpreter. In tts-mode, information (in files or through standard input) is treated as text to be rendered as speech. The default mode is command mode, though this may change in later versions."
To read a text file, you can use the command below:
The festival will start in text-to-speech (tts) mode and will read your text files for you. But now, we want to read PDF files and if you try to read PDF files directly (festival --tts paper.pdf), festival is most likely to speak the cryptic terms since it actually reads the content of PDF including its header (You know PDF is different than simple text file). So we will use a pdftotext command to convert our pdf file and then pipe the output to the festival so that festival reads the PDF files for us. You can use the syntax as below to read PDF files.
If you want to skip all those table of contents and prefaces or if you are in the middle of PDF, you can use the switches of pdftotext to change the starting and ending pages. For example, if I wish to read page 10 - 14 of a PDF, I would do:
Enjoy learning. I hope this post helps you ;)
Read more...
There are several text to speech tools available for linux but in this post, I will be using festival, a Text-to-speech (TTS) tool written in C++. Also, Ubuntu and its derivation are most likely to include by default espeak, a multi-lingual software speech synthesizer.
For ubuntu and debian based system, type the following to install festival:
samar@samar-Techgaun:~$ sudo apt-get install festival
Moreover, you can also install a pidgin plugin that uses festival:
samar@samar-Techgaun:~$ sudo apt-get install pidgin-festival
For now, you just need to install festival. Once you have installed festival, you can make it read text files for you. If you go through the online manual of festival, it says:
"Festival works in two fundamental modes, command mode and text-to-speech mode (tts-mode). In command mode, information (in files or through standard input) is treated as commands and is interpreted by a Scheme interpreter. In tts-mode, information (in files or through standard input) is treated as text to be rendered as speech. The default mode is command mode, though this may change in later versions."
To read a text file, you can use the command below:
samar@samar-Techgaun:~$ festival --tts mypaper.txt
The festival will start in text-to-speech (tts) mode and will read your text files for you. But now, we want to read PDF files and if you try to read PDF files directly (festival --tts paper.pdf), festival is most likely to speak the cryptic terms since it actually reads the content of PDF including its header (You know PDF is different than simple text file). So we will use a pdftotext command to convert our pdf file and then pipe the output to the festival so that festival reads the PDF files for us. You can use the syntax as below to read PDF files.
samar@samar-Techgaun:~$ pdftotext paper.pdf - | festival --tts
If you want to skip all those table of contents and prefaces or if you are in the middle of PDF, you can use the switches of pdftotext to change the starting and ending pages. For example, if I wish to read page 10 - 14 of a PDF, I would do:
samar@samar-Techgaun:~$ pdftotext -f 10 -l 14 paper.pdf - | festival --tts
Enjoy learning. I hope this post helps you ;)
Read more...
Bookmark this post: |
|
Saturday 27 October 2012
Linux Cat Command Examples
The cat command displays the content of file on the standard output. If multiple files are specified, the contents of all files will be concatenated and then displayed on the standard output. Likewise, if no file is specified, it will assume standard input (keyboard input) as the input to the command. The Ctrl + d is the shortcut used to save the contents in the appropriate output placeholder specified and exit the cat command.
Print content of file in standard output
samar@samar-Techgaun:~$ cat workers.txt
List of workers, designations & salary (in K):
Kshitiz Director 30
Bikky Manager  20


Abhis Sweeper  10
Rajesh Guard  12
Print line numbers
samar@samar-Techgaun:~$ cat -n workers.txt
     1 List of workers, designations & salary (in K):
     2 Kshitiz Director 30
     3 Bikky Manager  20
     4
     5
     6 Abhis Sweeper  10
     7 Rajesh Guard  12
Print line numbers for non-empty lines only
samar@samar-Techgaun:~$ cat -b workers.txt
     1 List of workers, designations & salary (in K):
     2 Kshitiz Director 30
     3 Bikky Manager  20


     4 Abhis Sweeper  10
     5 Rajesh Guard  12
Create a new file
samar@samar-Techgaun:~$ cat > newfile.txt
We can create text files
using cat command
once u finish writing,
press ctrl+d to save file
^d
Display content of multiple files
samar@samar-Techgaun:~$ cat workers.txt newfile.txt
List of workers, designations & salary (in K):
Kshitiz Director 30
Bikky Manager  20


Abhis Sweeper  10
Rajesh Guard  12
We can create text files
using cat command
once u finish writing,
press ctrl+d to save file
Combine multiple files to new file
samar@samar-Techgaun:~$ cat workers.txt newfile.txt > concat.txt
samar@samar-Techgaun:~$ cat concat.txt
List of workers, designations & salary (in K):
Kshitiz Director 30
Bikky Manager  20


Abhis Sweeper  10
Rajesh Guard  12
We can create text files
using cat command
once u finish writing,
press ctrl+d to save file
Append data to existing file
samar@samar-Techgaun:~$ cat >> newfile.txt
New line added
^d
samar@samar-Techgaun:~$ cat newfile.txt
We can create text files
using cat command
once u finish writing,
press ctrl+d to save file
New line added
Alternatively, you can use the syntax below if you wish to create new file combining the content of already existing file and standard input.
samar@samar-Techgaun:~$ cat newfile.txt - > myfile
thanks for everything
^d
samar@samar-Techgaun:~$ cat myfile
We can create text files
using cat command
once u finish writing,
press ctrl+d to save file
New line added
thanks for everything
Another possibility is to combine two text files with data from standard input (keyboard) in-between the contents of these two text files.
samar@samar-Techgaun:~$ cat workers.txt - newfile.txt > myfile

----------------------------------

^d
samar@samar-Techgaun:~$ cat myfile
List of workers, designations & salary (in K):
Kshitiz Director 30
Bikky Manager  20


Abhis Sweeper  10
Rajesh Guard  12

----------------------------------

We can create text files
using cat command
once u finish writing,
press ctrl+d to save file
New line added
Display $ sign at the end of each line
samar@samar-Techgaun:~$ cat -E workers.txt
List of workers, designations & salary (in K):$
Kshitiz Director 30$
Bikky Manager  20$
$
$
Abhis Sweeper  10$
Rajesh Guard  12$
Display ^I sign instead of TABs
samar@samar-Techgaun:~$ cat -T workers.txt
List of workers, designations & salary (in K):
Kshitiz^IDirector^I30
Bikky^IManager^I^I20


Abhis^ISweeper^I^I10
Rajesh^IGuard^I^I12
Display files with non-printing characters
samar@samar-Techgaun:~$ cat -v /bin/nc
In the example above, the non-printing characters are replaced with ^ and M- notation except for line breaks and TABs. This can be used to display the contents of binary files which would otherwise have shown gibberish text all over the console.
Show contents with tabs, line breaks and non-printing characters
samar@samar-Techgaun:~$ cat -A /bin/nc
The tab will be substituted by ^I, line breaks with $ and non-printing characters with ^ and M- notation. Actually, the -A switch is equivalent to -vET switch.
Supress/squeeze repeated empty lines
samar@samar-Techgaun:~$ cat -s workers.txt
List of workers, designations & salary (in K):
Kshitiz Director 30
Bikky Manager  20

Abhis Sweeper  10
Rajesh Guard  12
Using -s switch, we can squeeze repeatedly occurring blank lines and replace all the adjacent empty lines with a single empty line in the output. This might be useful to reformat a file with several empty lines in-between (eg. cat -s workers.txt > formatted_workers.txt).
Display last line first
samar@samar-Techgaun:~$ tac workers.txt
Rajesh Guard  12
Abhis Sweeper  10

Bikky Manager  20
Kshitiz Director 30
List of workers, designations & salary (in K):
It is the tac, not the cat that is doing the magic but just thought that this is the right place to make a note about this little known command.
Edit: Added here-doc examples. Thanks rho dai for pointing me this.
Parameter substitution using here-document strings
samar@samar-Techgaun:~$ cat > test << TEST
samar@samar-Techgaun:~$ I am $USER. My home is $HOME
samar@samar-Techgaun:~$ I came here from $OLDPWD
samar@samar-Techgaun:~$ TEST
samar@samar-Techgaun:~$ cat test
I am samar. My home is /home/samar
I came here from /home/samar/Downloads
Command expansion example
samar@samar-Techgaun:~$ cat > test << TEST
samar@samar-Techgaun:~$ $(ls /)
samar@samar-Techgaun:~$ TEST
samar@samar-Techgaun:~$ cat test
bin
boot
cdrom
dev
etc
home
initrd.img
initrd.img.old
lib
lost+found
media
mnt
opt
proc
root
run
sbin
selinux
srv
sys
tmp
usr
var
vmlinuz
vmlinuz.old
Parameter substitution turned off
samar@samar-Techgaun:~$ cat > test << 'TEST'
samar@samar-Techgaun:~$ I am $USER. My home is $HOME
samar@samar-Techgaun:~$ I came here from $OLDPWD
samar@samar-Techgaun:~$ TEST
samar@samar-Techgaun:~$ cat test
I am $USER. My home is $HOME
I came here from $OLDPWD
Note the difference between the last example and previous two examples. Enclosing the limit string TEST with quotes prevents the substitutions and expansions.
I hope these examples are useful. :)
Read more...
Bookmark this post: |
|
Subscribe to:
Posts (Atom)