Showing posts with label linux. Show all posts
Showing posts with label linux. Show all posts
Sunday 15 January 2012
Converting PDF Files To Text Or HTML From Linux Terminal
Earlier, we saw how we can merge or combine PDF files from terminal. Now, I am sharing two command line tools to convert PDF files to text or html files.
Poppler Utils is a great package of PDF rendering and conversion tools and should be installed before we convert PDF files to text or html files. You can install the poppler-utils issuing the following command in debian based distro. You can install them in your favorite distros using their corresponding package installers.
Now that poppler-utils is installed, we will be able to convert PDF files to text and HTML using pdftotext and pdftohtml command-line tools.
To convert a PDF files to text, we should use pdftotext command. Following is the simplest form of the command for converting a PDF file to text file.
This command also allows you to preserve the original layout in the pdf file using the -layout switch as below:
Similarly, if you wish to convert pages of specific range, you can use -f and -l switches to specify the first and last page to convert to text file. An example below would clarify things where I've choosen to convert pages from 4 to 8 into text.
Check the man page of pdftotext and also see the help for the tool to explore other options as well.
To convert a PDF file to HTML file, you can use the pdftohtml tool available in the poppler package. Before that, I will show how to use pdftotext command to convert the PDF file to HTML file.
Now, using the pdftohtml tool is not that different than pdftotext. A simplest form would be as below:
You can use the same arguments as in the pdftotext for this tool as well for specifying the range. However, -htmlmeta and -layout are only available in pdftotext. I would let you explore more on the pdftohtml tool.
I hope this information is useful for you. :)
Read more...
Poppler Utils is a great package of PDF rendering and conversion tools and should be installed before we convert PDF files to text or html files. You can install the poppler-utils issuing the following command in debian based distro. You can install them in your favorite distros using their corresponding package installers.
sudo apt-get install poppler-utils
Now that poppler-utils is installed, we will be able to convert PDF files to text and HTML using pdftotext and pdftohtml command-line tools.
PDF to Text
To convert a PDF files to text, we should use pdftotext command. Following is the simplest form of the command for converting a PDF file to text file.
pdftotext file.pdf file.txt
This command also allows you to preserve the original layout in the pdf file using the -layout switch as below:
pdftotext -layout file.pdf file.txt
Similarly, if you wish to convert pages of specific range, you can use -f and -l switches to specify the first and last page to convert to text file. An example below would clarify things where I've choosen to convert pages from 4 to 8 into text.
pdftotext -f 4 -l 8 file.pdf file.txt
Check the man page of pdftotext and also see the help for the tool to explore other options as well.
PDF to HTML
To convert a PDF file to HTML file, you can use the pdftohtml tool available in the poppler package. Before that, I will show how to use pdftotext command to convert the PDF file to HTML file.
pdftotext -f 4 -l 8 -htmlmeta file.pdf file.html
Now, using the pdftohtml tool is not that different than pdftotext. A simplest form would be as below:
pdftohtml file.pdf file.html
You can use the same arguments as in the pdftotext for this tool as well for specifying the range. However, -htmlmeta and -layout are only available in pdftotext. I would let you explore more on the pdftohtml tool.
I hope this information is useful for you. :)
Read more...
Bookmark this post: | 
|
Merge/Combine PDF Documents In Linux From Terminal
Hi everybody, I was inactive for a while due to some health problems(chronic sinusitis, to be specific) and would like to apologize for not writing. This time, I am writing about how you can easily combine pdf files into a single pdf file using a linux terminal.
pdftk is a small but powerful handy PDF manipulation tool with many useful features to work with PDF files. The MAN page for pdftk says, "If PDF is electronic paper, then pdftk is an electronic staple-remover, hole-punch, binder, secret-decoder-ring, and X-Ray-glasses. Pdftk is a simple tool for doing everyday things with PDF documents."
You can use it to:
* Merge PDF Documents or Collate PDF Page Scans
* Split PDF Pages into a New Document
* Rotate PDF Documents or Pages
* Decrypt Input as Necessary (Password Required)
* Encrypt Output as Desired
* Fill PDF Forms with X/FDF Data and/or Flatten Forms
* Generate FDF Data Stencils from PDF Forms
* Apply a Background Watermark or a Foreground Stamp
* Report PDF Metrics such as Metadata and Bookmarks
* Update PDF Metadata
* Attach Files to PDF Pages or the PDF Document
* Unpack PDF Attachments
* Burst a PDF Document into Single Pages
* Uncompress and Re-Compress Page Streams
* Repair Corrupted PDF (Where Possible)
Today I'll show you how to combine or merge two or more pdf documents to a single PDF document using this tool. Navigate to the folder containing the PDFs you want to merge and then type the following command:
The above command will take the PDF files in the alphabetical order and if you want to have your own order of the PDFs, say for an example, I have two PDFs a.pdf and b.pdf and I want pages from b.pdf to appear before a.pdf then I would simply do:
The pdftk is not limited to this simple merging method only, it has very powerful capabilities for merging documents. Below is an example of how I merged page 1-5 of first pdf and 10-15 of another pdf.
Below example shows how I can merge even pages from first pdf and odd pages from second pdf.
You can make numerous other variations and looking the MAN page for pdftk would be a good idea to explore more options. So why would we need heavy graphics based PDF editor when things can be done by a small commandline utility like pdftk.
I hope this post is useful to you. :)
Read more...
pdftk is a small but powerful handy PDF manipulation tool with many useful features to work with PDF files. The MAN page for pdftk says, "If PDF is electronic paper, then pdftk is an electronic staple-remover, hole-punch, binder, secret-decoder-ring, and X-Ray-glasses. Pdftk is a simple tool for doing everyday things with PDF documents."
You can use it to:
* Merge PDF Documents or Collate PDF Page Scans
* Split PDF Pages into a New Document
* Rotate PDF Documents or Pages
* Decrypt Input as Necessary (Password Required)
* Encrypt Output as Desired
* Fill PDF Forms with X/FDF Data and/or Flatten Forms
* Generate FDF Data Stencils from PDF Forms
* Apply a Background Watermark or a Foreground Stamp
* Report PDF Metrics such as Metadata and Bookmarks
* Update PDF Metadata
* Attach Files to PDF Pages or the PDF Document
* Unpack PDF Attachments
* Burst a PDF Document into Single Pages
* Uncompress and Re-Compress Page Streams
* Repair Corrupted PDF (Where Possible)
Today I'll show you how to combine or merge two or more pdf documents to a single PDF document using this tool. Navigate to the folder containing the PDFs you want to merge and then type the following command:
pdftk *.pdf cat output outputfile.pdf
The above command will take the PDF files in the alphabetical order and if you want to have your own order of the PDFs, say for an example, I have two PDFs a.pdf and b.pdf and I want pages from b.pdf to appear before a.pdf then I would simply do:
pdftk b.pdf a.pdf cat output outputfile.pdf
The pdftk is not limited to this simple merging method only, it has very powerful capabilities for merging documents. Below is an example of how I merged page 1-5 of first pdf and 10-15 of another pdf.
pdftk A=a.pdf B=b.pdf cat A1-5 B10-15 output outputfile.pdf
Below example shows how I can merge even pages from first pdf and odd pages from second pdf.
pdftk A=a.pdf B=b.pdf cat Aeven Bodd output outputfile.pdf
You can make numerous other variations and looking the MAN page for pdftk would be a good idea to explore more options. So why would we need heavy graphics based PDF editor when things can be done by a small commandline utility like pdftk.
I hope this post is useful to you. :)
Read more...
Bookmark this post: |
|
Wednesday 28 December 2011
Adding Regular User To Sudoers File In Linux
Hi everybody, this time I am writing about the different command line methods of adding regular user to the sudoers file in linux or in more obvious way, giving access to root privilege to certain regular users. The sudoers file(located at /etc/sudoers by default[in my distro i.e. ubuntu]) contains the information of groups and users who can execute commands with root privilege. I'll list 3 ways of adding users to the sudoers list so continue reading the post.
Method 1
The first way is to use the usermod command to append the user to the admin group. Since the admin group has the privilege of executing commands with sudo privilege, adding the user to the admin group is one easy way to add regular user to the sudoers file. The example command is as below(Replace user with the proper username which you want to add to sudoers list):
Method 2
This method is similar as above however the command is adduser this time and the command is even more simpler to remember. Just specify the respective user to be added to the admin group as below:
Method 3
The last method I'm writing about is the safe way of editing sudoers files. Linux advises to use visudo command to edit /etc/sudoers so that possible errors while writing in sudoers file can be avoided. Typing just visudo would open the /etc/sudoers file for editing, and in case, if you want to edit sudoer file in alternate location, type visudo -f sudoer_with_path. Anyway, to add new user to the default sudoers file, type sudo visudo and add the line as below(Replace user with the proper username to whom you want to give sudo privilege) at the end of file:
I hope these methods come useful for you.
Read more...
Method 1
The first way is to use the usermod command to append the user to the admin group. Since the admin group has the privilege of executing commands with sudo privilege, adding the user to the admin group is one easy way to add regular user to the sudoers file. The example command is as below(Replace user with the proper username which you want to add to sudoers list):
sudo usermod -a -G admin user
Method 2
This method is similar as above however the command is adduser this time and the command is even more simpler to remember. Just specify the respective user to be added to the admin group as below:
sudo adduser user admin
Method 3
The last method I'm writing about is the safe way of editing sudoers files. Linux advises to use visudo command to edit /etc/sudoers so that possible errors while writing in sudoers file can be avoided. Typing just visudo would open the /etc/sudoers file for editing, and in case, if you want to edit sudoer file in alternate location, type visudo -f sudoer_with_path. Anyway, to add new user to the default sudoers file, type sudo visudo and add the line as below(Replace user with the proper username to whom you want to give sudo privilege) at the end of file:
user ALL = (ALL) ALL
I hope these methods come useful for you.
Read more...
Bookmark this post: |
|
Sunday 18 December 2011
Copying Files From Remote Server Using SCP In Linux
Hi everybody, sometimes you need to copy files from remote server and only thing you have access to might be SSh. If you can access remote server via SSh, then you can copy files from the remote server using scp(secure file copy). This short tip will help you copy files from remote server using scp.
Scp is remote secure file copy program that makes use of SSh for the data transfer and uses the SSh authentication. The general syntax is as below:
Following was the command I used to copy a file from remote server to my computer. It will then ask for the password for the corresponding user before you can copy the file.
Also, there are GUIs for this purpose as well such as WinSCP for windows and Krusader file manager and gftp for linux distros. GUI would make things easier but still I am used to with command lines and I hope you are as well.
I hope this helps. :)
Edit(Dec 19): Paths with whitespaces must be escaped with \ character. An example of this is as below:
Read more...
Scp is remote secure file copy program that makes use of SSh for the data transfer and uses the SSh authentication. The general syntax is as below:
scp -P ssh_port user@server:remote_file_path local_file_path
Following was the command I used to copy a file from remote server to my computer. It will then ask for the password for the corresponding user before you can copy the file.
scp -P 222 netadmin@192.168.0.1:/home/kubh/Desktop/torrent_trackers_list.txt /samar/torrent_trackers.txt
Also, there are GUIs for this purpose as well such as WinSCP for windows and Krusader file manager and gftp for linux distros. GUI would make things easier but still I am used to with command lines and I hope you are as well.
I hope this helps. :)
Edit(Dec 19): Paths with whitespaces must be escaped with \ character. An example of this is as below:
samar@Techgaun:~$ scp -P 222 "netadmin@192.168.0.1:/home/netadmin/Downloads/Hostel\ Part\ III\ \(2011\)\ DVDRip\ 400MB/HOST.DVD_urgrove.com.mkv.002" /samar/Moviez/Hostel1.mkv.002
Read more...
Bookmark this post: |
|
Friday 16 December 2011
Useful Aliases To Make Things Easier In Linux
In this post we will see some of the useful aliases that I have made to work faster while I'm working in my system. From that, you can figure out such useful aliases for yourself. With this little customization, you will find so much ease and speed in doing different tasks you need to perform repeatedly.
Either you are a regular linux user or system administrator or tech-geek, you will want to make use of alias to makes several things shorter and easier.
Temporary aliases can be created using the alias command in the terminal. So to test the aliases I've posted below, you can type them in the terminal to see the effect temporarily. If you want to make aliases permanent, you can edit ~/.bashrc file and add those aliases inside this file. Even better, to separate aliases from the .bashrc file, you can put all your aliases by creating a new file ~/.bash_aliases and paste all your aliases in this file. Either way, you'll achieve the permanent aliases for yourself and you'll be finding things going easy and fast for you.
Quick Directory Jumps
Getting out from deep directory structure
The above aliases can help you while you are inside deep directory structure and want to get out to certain outer level in the same structure.
Shortcuts To Frequently Used Commands
With this post, what I would like to say is that there is no limit in making these aliases, eventually you will find the necessary aliases for yourself. If you have any other useful general purpose aliases, please feel free to share as the comment.
Read more...
Either you are a regular linux user or system administrator or tech-geek, you will want to make use of alias to makes several things shorter and easier.
Temporary aliases can be created using the alias command in the terminal. So to test the aliases I've posted below, you can type them in the terminal to see the effect temporarily. If you want to make aliases permanent, you can edit ~/.bashrc file and add those aliases inside this file. Even better, to separate aliases from the .bashrc file, you can put all your aliases by creating a new file ~/.bash_aliases and paste all your aliases in this file. Either way, you'll achieve the permanent aliases for yourself and you'll be finding things going easy and fast for you.
Quick Directory Jumps
alias www='cd /opt/lampp/htdocs/' #Navigating to my web root using www command(actually alias)
alias moviez='cd /samar/data/gallery/movies/' #Navigating to my movies folder by typing moviez
alias moviez='cd /samar/data/gallery/movies/' #Navigating to my movies folder by typing moviez
Getting out from deep directory structure
alias cd1='cd ..'
alias cd2='cd ../..'
alias cd3='cd ../../..'
alias cd4='cd ../../../..'
alias cd5='cd ../../../../..'
alias cd6='cd ../../../../../..'
alias cd2='cd ../..'
alias cd3='cd ../../..'
alias cd4='cd ../../../..'
alias cd5='cd ../../../../..'
alias cd6='cd ../../../../../..'
The above aliases can help you while you are inside deep directory structure and want to get out to certain outer level in the same structure.
Shortcuts To Frequently Used Commands
alias runlampp='sudo /opt/lampp/lampp start' #run lampp server bundle
alias stoplampp='sudo /opt/lampp/lampp start' #stop lampp server bundle
alias checkmail='grep -in "Subject:" /var/mail/$USER' #overview of mail
alias myserverlogin='ssh netadmin@192.168.0.1 -p 222 -X' #ssh login to server
alias rootnaut='sudo nautilus /' #open root nautilus file explorer
alias stoplampp='sudo /opt/lampp/lampp start' #stop lampp server bundle
alias checkmail='grep -in "Subject:" /var/mail/$USER' #overview of mail
alias myserverlogin='ssh netadmin@192.168.0.1 -p 222 -X' #ssh login to server
alias rootnaut='sudo nautilus /' #open root nautilus file explorer
With this post, what I would like to say is that there is no limit in making these aliases, eventually you will find the necessary aliases for yourself. If you have any other useful general purpose aliases, please feel free to share as the comment.
Read more...
Bookmark this post: |
|
Fast Switching To Previous Directory In Linux Terminal
I had a scenario in which I had to switch between two directories frequently while I was working on the remote server over SSh. Typing the directory paths frequently was getting so tedious that I had to know some way to switch between two directories with a single short command. Here is a small tip that will be useful in such cases.
I am presenting my scenario and you'll be able to adapt with your own scenario. So following are two directories I keep on working always.
/opt/lampp/htdocs/
and
~/gateway/bandMan/
So I have the scenario something like below.
I cd to the first directory with the command above and then perform series of numerous commands and then suddenly I've to go back to the second directory. And I do so by following command:
Again, after changing the directory, I perform several commands and after finishing my tasks on this folder, I need to switch back to previous directory. And I type the following command:
How it works
This information is for the tech enthusiasts who like to know how it works. When I navigate to another directory from the shell for the first time, a new environment variable OLDPWD is set which stores the path for previous directory before the last cd command was executed. Now what cd - does is switch to the path that OLDPWD variable is storing. If OLDPWD is empty, you will see the "bash: cd: OLDPWD not set" error.
Isn't it so simple? I hope you like this small tip. :)
Read more...
I am presenting my scenario and you'll be able to adapt with your own scenario. So following are two directories I keep on working always.
/opt/lampp/htdocs/
and
~/gateway/bandMan/
So I have the scenario something like below.
cd /opt/lampp/htdocs/
I cd to the first directory with the command above and then perform series of numerous commands and then suddenly I've to go back to the second directory. And I do so by following command:
cd ~/gateway/bandMan/
Again, after changing the directory, I perform several commands and after finishing my tasks on this folder, I need to switch back to previous directory. And I type the following command:
cd -
How it works
This information is for the tech enthusiasts who like to know how it works. When I navigate to another directory from the shell for the first time, a new environment variable OLDPWD is set which stores the path for previous directory before the last cd command was executed. Now what cd - does is switch to the path that OLDPWD variable is storing. If OLDPWD is empty, you will see the "bash: cd: OLDPWD not set" error.
Isn't it so simple? I hope you like this small tip. :)
Read more...
Bookmark this post: |
|
Friday 9 December 2011
Converting .CUE/.BIN Files To .ISO Format
Bchunk is a CD image format conversion tool that is capable of converting CD images from bin/cue to iso/cdr formats. Converting a .bin/.cue file to .iso can be done by using the bchunk command line tool.
The bin/cue format is used by some non-Unix cd-writing software, but is not supported on most other cd-writing programs. image.bin is the raw cd image file. image.cue is the track index file containing track types and offsets. basename is used for the beginning part of the created track files.
The produced .iso track contains an ISO file system, which can be mounted through a loop device on Linux systems, or written on a CD-R using cdrecord. The .cdr tracks are in the native CD audio format. They can be either written on a CD-R using cdrecord -audio, or converted to WAV (or any other sound format for that matter) using sox.
An example of this is:
Following are the available switches in the command, explore them if you need them.
OPTIONS
-v Makes binchunker print some more unnecessary messages, which should not be of interest for anyone.
-w Makes binchunker write audio tracks in WAV format.
-s Makes binchunker swap byte order in the samples of audio tracks.
-p Makes binchunker go into PSX mode and truncate MODE2/2352 tracks to 2336 bytes at offset 0 instead of normal 2048 bytes at offset 24.
-r Makes binchunker output MODE2/2352 tracks in raw format, from offset 0 for 2352 bytes. Good for MPEG/VCD.
To install this tool on ubuntu, open the terminal and type:
I hope it helps. :)
Read more...
The bin/cue format is used by some non-Unix cd-writing software, but is not supported on most other cd-writing programs. image.bin is the raw cd image file. image.cue is the track index file containing track types and offsets. basename is used for the beginning part of the created track files.
The produced .iso track contains an ISO file system, which can be mounted through a loop device on Linux systems, or written on a CD-R using cdrecord. The .cdr tracks are in the native CD audio format. They can be either written on a CD-R using cdrecord -audio, or converted to WAV (or any other sound format for that matter) using sox.
An example of this is:
bchunk image.bin image.cue image.iso
Following are the available switches in the command, explore them if you need them.
OPTIONS
-v Makes binchunker print some more unnecessary messages, which should not be of interest for anyone.
-w Makes binchunker write audio tracks in WAV format.
-s Makes binchunker swap byte order in the samples of audio tracks.
-p Makes binchunker go into PSX mode and truncate MODE2/2352 tracks to 2336 bytes at offset 0 instead of normal 2048 bytes at offset 24.
-r Makes binchunker output MODE2/2352 tracks in raw format, from offset 0 for 2352 bytes. Good for MPEG/VCD.
To install this tool on ubuntu, open the terminal and type:
sudo apt-get install bchunk
I hope it helps. :)
Read more...
Bookmark this post: |
|
Monday 14 November 2011
Installing SWI-Prolog In Ubuntu
SWI-Prolog is a free interpreter available for logical language Prolog. In order to practice Prolog in ubuntu(or linux), you need to install SWI Prolog in your system. SWI-Prolog is available for all major linux flavours for installation from the repository.
To install SWI-Prolog in ubuntu or debian based systems, type the following command in the terminal:
To run swi-prolog, open the terminal and type swipl to get to interactive prolog interpreter. Your prolog code must be saved with the extension .pl and to run the prolog file(which is known as consulting in case of prolog), cd to the respective directory, run the swipl and run the file by typing [filename]. and be sure to include the dot(.) and make sure you don't miss those big square braces.
To exit swi-prolog, type halt and press ENTER.
If you want to read the manual of SWI Prolog, open the browser and type in the address bar the address as file:///usr/lib/swi-prolog/doc/Manual/index.html and you can read reference manual.
I hope this makes a quick guide for installing and running swi-prolog in linux or more specifically ubuntu.
Read more...
To install SWI-Prolog in ubuntu or debian based systems, type the following command in the terminal:
sudo apt-get install swi-prolog
To run swi-prolog, open the terminal and type swipl to get to interactive prolog interpreter. Your prolog code must be saved with the extension .pl and to run the prolog file(which is known as consulting in case of prolog), cd to the respective directory, run the swipl and run the file by typing [filename]. and be sure to include the dot(.) and make sure you don't miss those big square braces.
To exit swi-prolog, type halt and press ENTER.
If you want to read the manual of SWI Prolog, open the browser and type in the address bar the address as file:///usr/lib/swi-prolog/doc/Manual/index.html and you can read reference manual.
I hope this makes a quick guide for installing and running swi-prolog in linux or more specifically ubuntu.
Read more...
Bookmark this post: |
|
Saturday 12 November 2011
Install LibreOffice In Ubuntu 10.04 or 10.10
The older 10.x versions of ubuntu, 10.04 Lucid Lynx and 10.10 Maverick Meerkat have openoffice.org and I wanted to install libreoffice for my friends in Lucid Lynx. This How To explains how to install libreoffice in ubuntu 10.04 and ubuntu 10.10 using PPA.
First, we have to remove openoffice in case it is installed. Its better to purge the openoffice.org installation with the following command.
Now lets add the Libreoffice PPA repository with the following command.
Now we need to update our package information for which you have to issue the following update command.
Now we are ready to go for installation of libreoffice. Type one of the following commands according to your desktop environment.
For Gnome Users:
This completes your job for installation of the libreoffice. Now leave for package download and you can access the tools from Applications -> Office.
About PPA(Taken from Launchpad
Using a Personal Package Archive (PPA), you can distribute software and updates directly to Ubuntu users. Create your source package, upload it and Launchpad will build binaries and then host them in your own apt repository.
That means Ubuntu users can install your packages in just the same way they install standard Ubuntu packages and they'll automatically receive updates as and when you make them.
Read more...
First, we have to remove openoffice in case it is installed. Its better to purge the openoffice.org installation with the following command.
sudo apt-get purge openoffice*.*
Now lets add the Libreoffice PPA repository with the following command.
sudo add-apt-repository ppa:libreoffice/ppa
Now we need to update our package information for which you have to issue the following update command.
sudo apt-get update
Now we are ready to go for installation of libreoffice. Type one of the following commands according to your desktop environment.
For Gnome Users:
sudo apt-get install libreoffice libreoffice-gnome
sudo apt-get install libreoffice libreoffice-kde
This completes your job for installation of the libreoffice. Now leave for package download and you can access the tools from Applications -> Office.
About PPA(Taken from Launchpad
Using a Personal Package Archive (PPA), you can distribute software and updates directly to Ubuntu users. Create your source package, upload it and Launchpad will build binaries and then host them in your own apt repository.
That means Ubuntu users can install your packages in just the same way they install standard Ubuntu packages and they'll automatically receive updates as and when you make them.
Read more...
Bookmark this post: |
|
Tuesday 8 November 2011
How To Go To Specific Line Number In Nano
Nano is a light-weight command line text editor that will be very useful in many cases such as while editing files on remote server through SSh. Numerous times, you want to jump to the specific line and this is very easy in nano editor.
First we need to know the line number and I usually use grep to do so. The grep -n switch will output the line number. Now if you know the line number, you can use either of the following ways to go to the specific line number.
First way is to open nano directly to the line of the file you want to reach. The syntax is something like below:
The above command will directly take you the line number 104 of file.sh file. Now, if you are already in nano and you want to reach to some specific line number, use the shortcut Ctrl + _ (underscore == Ctrl + Shift + -). Nano will ask you the line number to go to and enter the line number you want to go to. Another equivalent shortcut is Alt + g which I just discovered today.
I hope this helps. :)
Read more...
First we need to know the line number and I usually use grep to do so. The grep -n switch will output the line number. Now if you know the line number, you can use either of the following ways to go to the specific line number.
First way is to open nano directly to the line of the file you want to reach. The syntax is something like below:
nano +104 file.sh
The above command will directly take you the line number 104 of file.sh file. Now, if you are already in nano and you want to reach to some specific line number, use the shortcut Ctrl + _ (underscore == Ctrl + Shift + -). Nano will ask you the line number to go to and enter the line number you want to go to. Another equivalent shortcut is Alt + g which I just discovered today.
I hope this helps. :)
Read more...
Bookmark this post: |
|
Monday 7 November 2011
How To Find And Change Hostname In Linux
Several times,we want to change the hostname we have set during installation. In most cases, we don't care hostname during installation and later we might need to change it to something mandatory. So I will discuss on how we can view the hostname and change it according to our wish.
To simply know the hostname, you can open the terminal(gnome-terminal for ubuntu) where you will find a entry which is something similar to samar@Techgaun: ~$. This entry is in the format user@hostname so in this example, samar is the user and Techgaun is the hostname. So this way you could simply know your hostname.
Also, there is a hostname command which also can be used to know the hostname. It can also be used to edit the hostname of your system.
To view hostname with this command, open terminal and type:
To view the FQDN, you can type:
Now to change the hostname, just type:
The above might need restart of shell(or simply do Ctrl + Shift + T) to see the effect.
Also, the file containing the host name is /etc/hostname so to change the hostname permanently, you can edit this file as well.
and then change the entry for host name as per your requirement. Then you need to reboot your system to see the effect or you could alternatively do:
This will perfectly work for debian based systems. For the Redhat and similar variants, you need to edit /etc/sysconfig/network file and set its HOSTNAME field.
I hope this helps you. :)
Read more...
To simply know the hostname, you can open the terminal(gnome-terminal for ubuntu) where you will find a entry which is something similar to samar@Techgaun: ~$. This entry is in the format user@hostname so in this example, samar is the user and Techgaun is the hostname. So this way you could simply know your hostname.
Also, there is a hostname command which also can be used to know the hostname. It can also be used to edit the hostname of your system.
To view hostname with this command, open terminal and type:
hostname
To view the FQDN, you can type:
hostname -f
Now to change the hostname, just type:
sudo hostname NEW_HOSTNAME
The above might need restart of shell(or simply do Ctrl + Shift + T) to see the effect.
Also, the file containing the host name is /etc/hostname so to change the hostname permanently, you can edit this file as well.
sudo gedit /etc/hostname
and then change the entry for host name as per your requirement. Then you need to reboot your system to see the effect or you could alternatively do:
sudo /etc/init.d/hostname stop
This will perfectly work for debian based systems. For the Redhat and similar variants, you need to edit /etc/sysconfig/network file and set its HOSTNAME field.
I hope this helps you. :)
Read more...
Bookmark this post: |
|
Saturday 5 November 2011
Image Resizing Using Linux Command Line
Image resizing is one of those things in linux that should not be done using GUI. Better than GUI, there is a part of ImageMagick package for effective resizing of any image.
For resizing images, you need to have ImageMagick installed in your linux system. ImageMagick is a software suite to create, edit, and compose bitmap images. It can read, convert and write images in a variety of formats (about 100) including GIF, JPEG, JPEG-2000, PNG, PDF, PhotoCD, TIFF, and DPX. You can use ImageMagick to translate, flip, mirror, rotate, scale, shear and transform images, adjust image colors, apply various special effects, or draw text, lines, polygons, ellipses and Bezier curves.
For ubuntu and debian based distros, type the following in console for installation:
Now, to resize any image, we can either use mogrify or convert command(these commands are far more complex and useful than just resizing, check man mogrify for more details of their functionalities.) that is part of ImageMagick suite.
For example, to resize an image you can use the following command:
That would reduce the size to 50% of the original size.
To resize to certain pixel, you can specify the expected dimension as below:
Read more...
For resizing images, you need to have ImageMagick installed in your linux system. ImageMagick is a software suite to create, edit, and compose bitmap images. It can read, convert and write images in a variety of formats (about 100) including GIF, JPEG, JPEG-2000, PNG, PDF, PhotoCD, TIFF, and DPX. You can use ImageMagick to translate, flip, mirror, rotate, scale, shear and transform images, adjust image colors, apply various special effects, or draw text, lines, polygons, ellipses and Bezier curves.
For ubuntu and debian based distros, type the following in console for installation:
sudo apt-get install imagemagick
Now, to resize any image, we can either use mogrify or convert command(these commands are far more complex and useful than just resizing, check man mogrify for more details of their functionalities.) that is part of ImageMagick suite.
For example, to resize an image you can use the following command:
mogrify -resize 50% image_name.jpg
That would reduce the size to 50% of the original size.
To resize to certain pixel, you can specify the expected dimension as below:
mogrify -resize 800x600 image_name.jpg
Read more...
Bookmark this post: |
|
Tuesday 1 November 2011
How To Search Strings In Binary Files in Linux
There is this very useful strings command in linux that lets us to search strings inside binary and object files. This is useful for developers in many cases and also for linux binary crackers. Also, end users can study more about executable with this command.
I've used strings command several times for ELF binary cracking and the command helps us gather more information of any given executable. It supports many executables and object formats such as elf32-i386, a.out-i386-linux, pei-i386, elf32-little, elf32-big, elf64-x86-64, pei-x86-64, elf64-l1om, elf64-little, elf64-big, plugin, srec, symbolsrec, verilog, tekhex, binary, ihex, and trad-core.
Usage:
The command itself is pretty easy to use, the simplest being as below:
Specify the name of object or executable file of supported type and you are good to go. However you might want to customize the way strings command searches the strings in the given file. For example, to search for strings in all the sections of the file(by default, it searches only
the data section), you can use the command as below:
There are much more options which you can study by typing strings -h and man strings in the terminal. I hope it helps you.
Read more...
I've used strings command several times for ELF binary cracking and the command helps us gather more information of any given executable. It supports many executables and object formats such as elf32-i386, a.out-i386-linux, pei-i386, elf32-little, elf32-big, elf64-x86-64, pei-x86-64, elf64-l1om, elf64-little, elf64-big, plugin, srec, symbolsrec, verilog, tekhex, binary, ihex, and trad-core.
Usage:
The command itself is pretty easy to use, the simplest being as below:
strings file_name
Specify the name of object or executable file of supported type and you are good to go. However you might want to customize the way strings command searches the strings in the given file. For example, to search for strings in all the sections of the file(by default, it searches only
the data section), you can use the command as below:
strings -a file_name
There are much more options which you can study by typing strings -h and man strings in the terminal. I hope it helps you.
Read more...
Bookmark this post: |
|
Shortcuts For Copy and Paste In Linux Terminal
If you are used to with Ctrl + c and Ctrl + v for copy paste tasks in graphical tools, you will come to know these shortcuts do not work in linux terminal. However you still have the luxury of using such shortcut but with the help of one more finger to press the extra Shift key.
You might have already figured out what shortcuts you have to use. If not, they are Shift + Ctrl + C and Shift + Ctrl + V for copy and paste respectively. I hope this is helpful.
Read more...
You might have already figured out what shortcuts you have to use. If not, they are Shift + Ctrl + C and Shift + Ctrl + V for copy and paste respectively. I hope this is helpful.
Read more...
Bookmark this post: |
|
Two Really Useful Shortcuts While Using Linux Terminal
In this post, I am going to share two really useful shortcuts while using linux terminal. When you get to use these two shortcuts, you will always be using them for ease while operating under terminal.
Both of these shortcuts are used for ease while erasing the erroneous words or commands in terminal. Rather than pressing backspace all the time, you would love to see some shortcuts to achieve the same. And here are two commands that you will usually be using.
The first one is Ctrl + w which will erase the current word you are typing. For example, you typed cat abcdef and you want to remove abcdef, then you can use Ctrl + w. So this shortcut would erase whole word at the last of command you are typing.
The other one is Ctrl + u which will erase whole line of command you are currently typing. For instance, you typed ls -lia /home/user/Downloads and you think "Oh that's not the command I want to execute right now", then you can safely use the shortcut Ctrl + u.
I hope you find these shortcuts useful while using linux terminal.
Read more...
Bookmark this post: |
|
Wednesday 26 October 2011
Useful and Basic Commands and Shortcuts For Ubuntu Beginners
One of my friends asked me to list useful commands and shortcuts for him to use in his ubuntu distro. I listed some pretty useful ones and am also sharing them over here.
Basic Commands
Alt + F1: Opens application menu.
Alt + F2: Opens run command(something similar to run command in windows)
Ctrl +Alt + FN: Switch to TTYN terminals
Ctrl +Alt + F7: Switch to X Display
mkdir <dir_name>: Create a directory
cd $HOME: Set the current path as your home directory
cd /: Set the current path as root filesystem
Privileged commands: Note that most of these commands require you to have sudoers privilege which is specified in /etc/sudoers file.
sudo su: Run the shell as root user.
sudo su user: Run the shell as the user specified
sudo command: Run the specified command with root privilege
gksudo command: Run the specified command as graphical root mode.(used for graphical programs)
passwd: Change your password
Basic Network Commands
ifconfig: Displays information about network. Also, ifconfig interface would give information about the specified interface.
iwconfig: Displays information about wireless network
ping host_or_IP: Pings to check if the specified host or IP is online or not. Also useful for knowing if you are connected to some other network eg. internet.
host ip_addr: Displays hostname for specified IP address by querying nameservers specified in /etc/resolv.conf
ifup interface: Bring the specified network up.
ifdown interface: Bring the specified network down.
ssh user@hostname -p PORTNO: Establish SSh connection to specified host and port number and login as specified user.
Commands For Package Management: These commands require root privilege so either escalate privilege to root by sudo su command or precede each commands with sudo.
apt-get install package1 package2 .. packageN: Download and install the package(s) specified.
apt-get install -d package: Just download the packages(no installation)
apt-get update: Update packages information.
apt-get dist-upgrade: Perform distro version upgrade.
do-release-upgrade: Perform distro version upgrade.
apt-get remove package: Remove the specified package(s).
apt-get -f install: Fix packages problem.
dpkg --configure -a: Fix broken packages.
Other/Misc. Commands
id: Displays user and group IDs for current user.
uname -a: Displays all kernel information
gedit: Open text editor
nautilus: Open nautilus file manager
gksudo nautilus: Open root nautilus file manager
lsb_release -a: Get information about installed ubuntu version
These are some of the commands that has come in my mind as of now. I might update this list when some other commands come into my mind. By the way, TAB is very useful in terminal as it allows auto-completion and suggestion of commands and files in ubuntu. What this means is if you type do- and then press TAB, it will auto complete the command to do-release-upgrade thus saving some important time. Also be sure to share the useful commands in the comment section below.
Read more...
Bookmark this post: |
|
Wednesday 28 September 2011
Tools For Customizing Ubuntu Into Your Custom Distro
Hello everybody, I'm listing some of the tools that can be used to customize the ubuntu distro and create your own flavour of ubuntu. I'm saying ubuntu specifically because I've tested them on ubuntu but some work for all debian based distro and maybe some work for all linux distro.
If you want to customize the ubuntu distro, you need an ISO file of the ubuntu of your preferred version. For the terminal lovers, the following two links are very helpful:
Ubuntu Live CD Customization
Ubuntu Install CD Customization
Now for those people who hate terminal and would like to the same thing using GUI, I'm listing here few of the tools that you can use.
1) Ubuntu Customization Kit: UCK is a tool that helps you customizing official Ubuntu Live CDs (including Kubuntu/Xubuntu and Edubuntu) to your needs. You can add any package to the live system like, for example, language packs, applications, etc.
2) RemasterSys: This script creates a livecd of the installed system. You can either make a distributable livecd or backup of your system. The resulting iso file can be used on any other PC that still meets the original minimum requirements of Ubuntu or Debian. Things like the graphics card and other hardware will be configured and setup automatically and you do not have to use identical hardware. Ubuntu's live boot tool, casper, currently blacklists Nvidia and AMD proprietary drivers so they will not be available on the live system and will need to be reinstalled after installation of your custom system.
3) Reconstructor Engine: Reconstructor is a GNU/Linux distribution customization and creation toolkit. It allows for the customization of the Ubuntu GNU/Linux distribution. Customizations include boot logo image and text color, wallpaper, themes, icons, applications, and more. Personally, I didn't like this one very much. Check this site.
4) Live Magic: Live-helper is a collection of programs that can be used to build Debian Live system images. The philosophy behind live-helper is to provide a collection of small, simple, and easily understood tools that can be used in your own program to automate building of a Live system.
5) Live Scripts: Linux Live is a set of shell scripts which allows you to create your own Live Linux from an already installed Linux distribution. The Live system you create will be bootable from CD-ROM or a disk device, for example USB Flash Drive, USB Pen Drive, Camera connected to USB port, and so on. People use Linux Live scripts to boot Linux from iPod as well.
6) Revisor For Fedora: Revisor enables you to customize and compose your own Fedora based installation and live media. It does so by presenting you a GUI with all options you can click your way through, a command-line interface and extended configuration files for more advanced users. Features that Revisor has vary from customizing the packages available during the installation and/or installed on the live media, to fully customizing the desktop environment for the live media.
I hope these helps. :)
Read more...
Bookmark this post: |
|
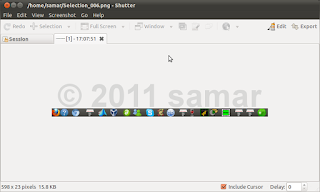
Shutter : Advanced Screenshot Tool For Linux
The default screenshot tool in linux(I'm using ubuntu 10.10) does not have much features as some of you might have desired but there exists yet another tool known as Shutter that has lots of functionalities as a screenshot tool. Shutter is a feature rich screenshot tool available for many flavours of linux distribution.
With shutter, you can take a screenshot of a specific area, window, your whole screen, or even of a website – apply different effects to it, draw on it to highlight points, and then upload to an image hosting site, all within one window. There are numerous plugins written in Perl and bash included within the shutter as plugins and you can give different sexy looks to your screenshot. So for a blogger, writer and screen-sharer, this tool is a must if you are using linux.
To install shutter, either open the software centre according to your distro, search for shutter and install from there. For ubuntu, you can alternatively type the following from your terminal to install shutter:
To open shutter, click on Applications -> Accessories -> Shutter. Then you can use various features of shutter to take screenshots of window, selection, websites and full screen and then edit your screenshot, hide the sensitive areas and apply effects of your choice to the screenshots.
Some sample screenshots of the tool itself:
GUI of shutter:
Screenshot of website:

Screenshot of selection:

Read more...
With shutter, you can take a screenshot of a specific area, window, your whole screen, or even of a website – apply different effects to it, draw on it to highlight points, and then upload to an image hosting site, all within one window. There are numerous plugins written in Perl and bash included within the shutter as plugins and you can give different sexy looks to your screenshot. So for a blogger, writer and screen-sharer, this tool is a must if you are using linux.
To install shutter, either open the software centre according to your distro, search for shutter and install from there. For ubuntu, you can alternatively type the following from your terminal to install shutter:
sudo apt-get install shutter
To open shutter, click on Applications -> Accessories -> Shutter. Then you can use various features of shutter to take screenshots of window, selection, websites and full screen and then edit your screenshot, hide the sensitive areas and apply effects of your choice to the screenshots.
Some sample screenshots of the tool itself:
GUI of shutter:

Screenshot of website:

Screenshot of selection:
Read more...
Bookmark this post: |
|
Monday 5 September 2011
Solving MySQL Connection Error In Non-standard Bundles
For a standard MySQL installation from software repository, there won't be much problem in using MySQL for different connections however if you install some other bundles such as LAMPP, you are most likely to see an error Can't connect to local MySQL server through socket '/var/run/mysqld/mysqld.sock' however the solution to this is as easy as making a symbolic link of MySQL socket.
In my case, I had LAMPP installed and the MySQL socket was in the folder /opt/lampp/var/mysql/mysql.sock and your might be different so first figure out the location of this MySQL socket and then just enter the following commands and you're done.
That should work as a charm. I hope this helps :)
Read more...
In my case, I had LAMPP installed and the MySQL socket was in the folder /opt/lampp/var/mysql/mysql.sock and your might be different so first figure out the location of this MySQL socket and then just enter the following commands and you're done.
samar@Techgaun:~$ sudo mkdir /var/run/mysqld/
samar@Techgaun:~$ sudo ln -s /opt/lampp/var/mysql/mysql.sock /var/run/mysqld/mysqld.sock
samar@Techgaun:~$ sudo ln -s /opt/lampp/var/mysql/mysql.sock /var/run/mysqld/mysqld.sock
That should work as a charm. I hope this helps :)
Read more...
Bookmark this post: |
|
Saturday 3 September 2011
Javascript Linux Emulator
JS/Linux is a javascript linux emulator developed by Fabrice Bellard and I believe its a very creative concept. Anyway, check the javascript linux here. Isn't it fun to have linux in the browser :D
Read more...
Read more...
Bookmark this post: |
|
Subscribe to:
Posts (Atom)