Showing posts with label linux. Show all posts
Showing posts with label linux. Show all posts
Tuesday 27 November 2012
Basic Guide To Crontab
Well it has been a busy week and now I am back with this basic guide to running cron jobs in linux.
Cron is a time-based job scheduling program which comes shipped with most linux distributions and enables users to execute commands or set of scripts automatically at the specified time. Cron is particularly important for system administration and maintenance though it can be used for any general purpose such as scheduling your porn downloads. My post is based on the Vixie Cron, a popular implementation of Cron by Paul Vixie which is by default the cron program in Ubuntu. Other implementations of the cron are anacron, fcron, and dcron.
The cron daemon runs automatically during the startup and consults the crontabs (shorthand for cron tables) for jobs to executed. Crontabs are nothing but files containing the commands to be run at the specified time, however there is a particular (& simple to remember) syntax for cronjobs to be run. You could directly edit these cron tables files but that's not the recommended way. You should always use the crontab editor to add/update jobs to the crontabs.
Cron searches its spool area (located at /var/spool/cron/crontabs) for crontab files which are named after the user accounts from /etc/passwd. As a matter of precaution, you should not directly manipulate the files in there. Additionally, cron reads the /etc/crontab file and all the files in /etc/cron.d. Also, there are other folders: /etc/cron.daily, /etc/cron.hourly, /etc/cron.monthly, and /etc/cron.weekly. And, the name of folders are obvious so if you put the scripts in one of these folders, your script will run either daily or hourly or monthly or weekly.
Since you got several files associated with cron, you have bunch of options on running the cron jobs in your system. First lets start with the crontab tool which is used to install, deinstall or list the tables used to drive the cron daemon. If the /etc/cron.allow file exists, then you must be listed (one user per line) therein in order to be allowed to use this command. If the /etc/cron.allow file does not exist but the /etc/cron.deny file does exist, then you must not be listed in the /etc/cron.deny file in order to use this command.
The crontab command provides following options:
crontab can be configured to use any of the editors.
To list the user's crontab, use the following command:
To delete existing cron table, type:
To install new cron table, type:
If you are wishing to add commands that require root privilege for execution, make sure you prepend sudo in the above command to add such commands to crontabs. The cron table expects each line of cron job in the following format:
These columns take the values in the range below:
Apart from these values, the cron entries accept other special characters. In each of these five columns:
Now we know the format of how should each line of cron entry should look like, lets see some examples.
The information below is taken directly from man 5 crontab and can serve as a good reference for special strings in place of the 5 columns:
Now that you are feeling better with cronjobs, we will see how we can add cronjobs in the /etc/crontab file. The different thing about this crontab file is that there is an extra column for user field so that the particular cron entry is executed as the specified user.
The format for cron entry is similar to what we've seen already, with an extra column for user.
You can use any text editor such as nano or vi to edit the /etc/crontab file.
Finally, once you update crons, make sure to restart the cron daemon to ensure your new cron entries get read by the daemon.
I hope this primer for crontab helps you in your job scheduling job :D
Read more...
Cron is a time-based job scheduling program which comes shipped with most linux distributions and enables users to execute commands or set of scripts automatically at the specified time. Cron is particularly important for system administration and maintenance though it can be used for any general purpose such as scheduling your porn downloads. My post is based on the Vixie Cron, a popular implementation of Cron by Paul Vixie which is by default the cron program in Ubuntu. Other implementations of the cron are anacron, fcron, and dcron.
The cron daemon runs automatically during the startup and consults the crontabs (shorthand for cron tables) for jobs to executed. Crontabs are nothing but files containing the commands to be run at the specified time, however there is a particular (& simple to remember) syntax for cronjobs to be run. You could directly edit these cron tables files but that's not the recommended way. You should always use the crontab editor to add/update jobs to the crontabs.
Cron searches its spool area (located at /var/spool/cron/crontabs) for crontab files which are named after the user accounts from /etc/passwd. As a matter of precaution, you should not directly manipulate the files in there. Additionally, cron reads the /etc/crontab file and all the files in /etc/cron.d. Also, there are other folders: /etc/cron.daily, /etc/cron.hourly, /etc/cron.monthly, and /etc/cron.weekly. And, the name of folders are obvious so if you put the scripts in one of these folders, your script will run either daily or hourly or monthly or weekly.
Since you got several files associated with cron, you have bunch of options on running the cron jobs in your system. First lets start with the crontab tool which is used to install, deinstall or list the tables used to drive the cron daemon. If the /etc/cron.allow file exists, then you must be listed (one user per line) therein in order to be allowed to use this command. If the /etc/cron.allow file does not exist but the /etc/cron.deny file does exist, then you must not be listed in the /etc/cron.deny file in order to use this command.
The crontab command provides following options:
        -e edit user's crontab
 -l list user's crontab
 -r delete user's crontab
 -i prompt before deleting user's crontab
crontab can be configured to use any of the editors.
To list the user's crontab, use the following command:
$ crontab -l
To delete existing cron table, type:
$ crontab -ir
To install new cron table, type:
$ crontab -e
If you are wishing to add commands that require root privilege for execution, make sure you prepend sudo in the above command to add such commands to crontabs. The cron table expects each line of cron job in the following format:
m h dom mon dow command
i.e.
minute hour day_of_month month day_of_week command_to_run
i.e.
minute hour day_of_month month day_of_week command_to_run
These columns take the values in the range below:
  Minute (0 - 59)
  Hour (0 - 23)
  Day of month (1 - 31)
  Month (1 - 12)
  Day of the week (0 - 6, 0 representing sunday, 6 saturday)
Apart from these values, the cron entries accept other special characters. In each of these five columns:
- An asterisk (*) stands for "every".
- Slashes (/) are used to describe increments of ranges eg. */15 in minutes column would execute the specified command regularly and repeatedly after 15 minute.
- Commas (,) are used to separate items of a list. eg. using 1,2,3 in the 5th field (day of week) would mean Mondays, Tuesday, and Wednesday.
- Hyphens (-) are used to define ranges. For example, 2-5 in the 5th field would indicate Tuesday to Friday.
Now we know the format of how should each line of cron entry should look like, lets see some examples.
Run backup at 5 a.m every Monday
0 5 * * 1 /bin/mybackup
Run backup at 12:01 a.m monday-thursday
1 0 * * 1-4 /bin/mybackup
Run backup at 12:01 a.m on monday and thursday
1 0 * * 1,4 /bin/mybackup
Run backup every minute
* * * * * /bin/mybackup
Run backup every 15 minutes repeatedly
*/15 * * * * /bin/mybackup
The information below is taken directly from man 5 crontab and can serve as a good reference for special strings in place of the 5 columns:
              @reboot        Run once, at startup.
              @yearly        Run once a year, "0 0 1 1 *".
              @annually      (same as @yearly)
              @monthly       Run once a month, "0 0 1 * *".
              @weekly        Run once a week, "0 0 * * 0".
              @daily         Run once a day, "0 0 * * *".
              @midnight      (same as @daily)
              @hourly        Run once an hour, "0 * * * *".
Now that you are feeling better with cronjobs, we will see how we can add cronjobs in the /etc/crontab file. The different thing about this crontab file is that there is an extra column for user field so that the particular cron entry is executed as the specified user.
The format for cron entry is similar to what we've seen already, with an extra column for user.
m h dom mon dow user command
You can use any text editor such as nano or vi to edit the /etc/crontab file.
Finally, once you update crons, make sure to restart the cron daemon to ensure your new cron entries get read by the daemon.
$ sudo service cron restart
I hope this primer for crontab helps you in your job scheduling job :D
Read more...
Bookmark this post: | 
|
Friday 23 November 2012
Video Transcoding With HandBrake In Linux
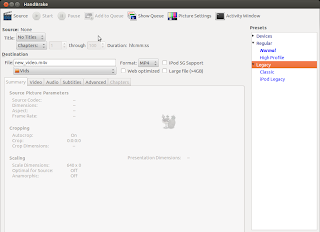
HandBrake is a GPL-licensed, multiplatform, multithreaded video transcoder available for major platforms: linux, mac, and windows. HandBrake converts video from nearly any format to a handful of modern ones.

Handbrake can save output in two containers, MP4 and MKV and I've been using it as a MKV transcoder for a while and I'm quite satisfied with it. Even though the official wiki says its not a ripper, I can see it to be quite useful DVD ripper.
Handbrake is available in CLI (HandBrakeCLI) and GUI (ghb) mode. Hence this offers the flexibility to choose the appropriate version according to your linux personality. As of now, we can install HandBrake from PPA and the latest version is v. 0.9.8 released back in July this year.
HandBrake can be installed from PPA. Issue the following commands in your terminal
Or if you wish to install the GUI version, type:
I recommend using the CLI version since you can transcode/convert videos much more efficiently if you use the CLI version. But if you are not comfortable with the command line interfaces, the GUI version of HandBrake is also quite good.
Only problem I have felt is the naming convention of the commands for both the GUI and CLI versions of the tool. In order to run two versions of this tool, you need to type HandBrakeCLI for CLI version and ghb for the GUI version. The problem here is with the naming convention for the binaries. I mean, the names handbrake-cli and handbrake-gtk would be more straightforward than these badly chosen names. Otherwise, the tool does pretty good job of video conversion and can be good alternative if you are not comfortable with ffmpeg. Note that ffmpeg is also capable of video conversions of different formats and is a great tool. :)
Read more...
Handbrake can save output in two containers, MP4 and MKV and I've been using it as a MKV transcoder for a while and I'm quite satisfied with it. Even though the official wiki says its not a ripper, I can see it to be quite useful DVD ripper.
Handbrake is available in CLI (HandBrakeCLI) and GUI (ghb) mode. Hence this offers the flexibility to choose the appropriate version according to your linux personality. As of now, we can install HandBrake from PPA and the latest version is v. 0.9.8 released back in July this year.
HandBrake can be installed from PPA. Issue the following commands in your terminal
$ sudo add-apt-repository ppa:stebbins/handbrake-releases
$ sudo apt-get update
$ sudo apt-get install handbrake-cli
$ sudo apt-get update
$ sudo apt-get install handbrake-cli
Or if you wish to install the GUI version, type:
$ sudo apt-get install handbrake-gtk
I recommend using the CLI version since you can transcode/convert videos much more efficiently if you use the CLI version. But if you are not comfortable with the command line interfaces, the GUI version of HandBrake is also quite good.

Only problem I have felt is the naming convention of the commands for both the GUI and CLI versions of the tool. In order to run two versions of this tool, you need to type HandBrakeCLI for CLI version and ghb for the GUI version. The problem here is with the naming convention for the binaries. I mean, the names handbrake-cli and handbrake-gtk would be more straightforward than these badly chosen names. Otherwise, the tool does pretty good job of video conversion and can be good alternative if you are not comfortable with ffmpeg. Note that ffmpeg is also capable of video conversions of different formats and is a great tool. :)
Read more...
Bookmark this post: |
|
Tuesday 13 November 2012
Linux Mint 14 "Nadia" RC Released
After 6 months of incremental development on top of stable and reliable technologies such as MATE, Cinnamon and MDM, Linux Mint 14 codenamed "Nadia" RC is available for download.

For the first time since Linux Mint 11, the development team was able to capitalize on upstream technology which works and fits its goals. After 6 months of incremental development, Linux Mint 14 features an impressive list of improvements, increased stability and a refined desktop experience. This new release comes with updated software and brings refinements and new features to make your desktop even more comfortable to use. Linux Mint 14 "Nadia" is based upon the Ubuntu 12.10 "Quantal Quetzal".
The download links (torrents and direct both) are available at this blog post.
Useful Links
Download Nadia
Nadia release notes
Whats New in Nadia
Read more...
Bookmark this post: |
|
Saturday 3 November 2012
Make Your Linux Read Papers For You
Fed up of reading text files and PDF papers? Is you eye power degrading day by day and can't hold even few minutes on screen? Don't worry, you can easily make your linux system speak and read all those papers for you.
There are several text to speech tools available for linux but in this post, I will be using festival, a Text-to-speech (TTS) tool written in C++. Also, Ubuntu and its derivation are most likely to include by default espeak, a multi-lingual software speech synthesizer.
For ubuntu and debian based system, type the following to install festival:
Moreover, you can also install a pidgin plugin that uses festival:
For now, you just need to install festival. Once you have installed festival, you can make it read text files for you. If you go through the online manual of festival, it says:
"Festival works in two fundamental modes, command mode and text-to-speech mode (tts-mode). In command mode, information (in files or through standard input) is treated as commands and is interpreted by a Scheme interpreter. In tts-mode, information (in files or through standard input) is treated as text to be rendered as speech. The default mode is command mode, though this may change in later versions."
To read a text file, you can use the command below:
The festival will start in text-to-speech (tts) mode and will read your text files for you. But now, we want to read PDF files and if you try to read PDF files directly (festival --tts paper.pdf), festival is most likely to speak the cryptic terms since it actually reads the content of PDF including its header (You know PDF is different than simple text file). So we will use a pdftotext command to convert our pdf file and then pipe the output to the festival so that festival reads the PDF files for us. You can use the syntax as below to read PDF files.
If you want to skip all those table of contents and prefaces or if you are in the middle of PDF, you can use the switches of pdftotext to change the starting and ending pages. For example, if I wish to read page 10 - 14 of a PDF, I would do:
Enjoy learning. I hope this post helps you ;)
Read more...
There are several text to speech tools available for linux but in this post, I will be using festival, a Text-to-speech (TTS) tool written in C++. Also, Ubuntu and its derivation are most likely to include by default espeak, a multi-lingual software speech synthesizer.
For ubuntu and debian based system, type the following to install festival:
samar@samar-Techgaun:~$ sudo apt-get install festival
Moreover, you can also install a pidgin plugin that uses festival:
samar@samar-Techgaun:~$ sudo apt-get install pidgin-festival
For now, you just need to install festival. Once you have installed festival, you can make it read text files for you. If you go through the online manual of festival, it says:
"Festival works in two fundamental modes, command mode and text-to-speech mode (tts-mode). In command mode, information (in files or through standard input) is treated as commands and is interpreted by a Scheme interpreter. In tts-mode, information (in files or through standard input) is treated as text to be rendered as speech. The default mode is command mode, though this may change in later versions."
To read a text file, you can use the command below:
samar@samar-Techgaun:~$ festival --tts mypaper.txt
The festival will start in text-to-speech (tts) mode and will read your text files for you. But now, we want to read PDF files and if you try to read PDF files directly (festival --tts paper.pdf), festival is most likely to speak the cryptic terms since it actually reads the content of PDF including its header (You know PDF is different than simple text file). So we will use a pdftotext command to convert our pdf file and then pipe the output to the festival so that festival reads the PDF files for us. You can use the syntax as below to read PDF files.
samar@samar-Techgaun:~$ pdftotext paper.pdf - | festival --tts
If you want to skip all those table of contents and prefaces or if you are in the middle of PDF, you can use the switches of pdftotext to change the starting and ending pages. For example, if I wish to read page 10 - 14 of a PDF, I would do:
samar@samar-Techgaun:~$ pdftotext -f 10 -l 14 paper.pdf - | festival --tts
Enjoy learning. I hope this post helps you ;)
Read more...
Bookmark this post: |
|
Wednesday 31 October 2012
CodeWeavers Announces Free CrossOver Giveaway
CodeWeavers, the developer of CrossOver has decided to run a 24-hour free giveaway for their famous wine-based product, CrossOver.
CrossOver allows you to install many popular Windows applications and PC games on your Linux computer. It's easy, affordable, and best of all, there's no Windows license required. Your Windows applications and games integrate seamlessly on your computer; just click and run. CrossOver is capable of running a wide range of Windows software and games.
On Wednesday, Oct. 31, 2012, beginning at 00:00 Central Time (-5 GMT), anyone visiting CodeWeavers’ Flock The Vote promotional web site (flock.codeweavers.com) will be able to download a free, fully functional copy of either CrossOver Mac or CrossOver Linux. Each copy comes complete with 12 months of support and product upgrades. Upon registering your name and e-mail address along with your version (CrossOver Mac or CrossOver Linux), you will get an e-mail with the instructions for download. The offer will continue for 24 hours, from 00:00 to 23:59, Oct. 31, 2012. Flock The Vote is an initiative to get more Americans to vote in the upcoming 2012 Presidential elections.
Update: direct download links:
32 bit Debian/Ubuntu
64 bit Debian/Ubuntu
32/64 bit Red Hat (Fedora, SUSE, Mandriva)
Installer for all other linux distros
Mac and Others
Sandy survivors, you can still get the offer from HERE.
Read more...
CrossOver allows you to install many popular Windows applications and PC games on your Linux computer. It's easy, affordable, and best of all, there's no Windows license required. Your Windows applications and games integrate seamlessly on your computer; just click and run. CrossOver is capable of running a wide range of Windows software and games.
On Wednesday, Oct. 31, 2012, beginning at 00:00 Central Time (-5 GMT), anyone visiting CodeWeavers’ Flock The Vote promotional web site (flock.codeweavers.com) will be able to download a free, fully functional copy of either CrossOver Mac or CrossOver Linux. Each copy comes complete with 12 months of support and product upgrades. Upon registering your name and e-mail address along with your version (CrossOver Mac or CrossOver Linux), you will get an e-mail with the instructions for download. The offer will continue for 24 hours, from 00:00 to 23:59, Oct. 31, 2012. Flock The Vote is an initiative to get more Americans to vote in the upcoming 2012 Presidential elections.
Get Free Copy Of CrossOver
Update: direct download links:
32 bit Debian/Ubuntu
64 bit Debian/Ubuntu
32/64 bit Red Hat (Fedora, SUSE, Mandriva)
Installer for all other linux distros
Mac and Others
Sandy survivors, you can still get the offer from HERE.
Read more...
Bookmark this post: |
|
Saturday 27 October 2012
Steam for Linux Beta Survey Is Out
Lately, Valve Software, the vendor for steam has been showing lots of interest to develop games for linux platforms and offer linux users one of the best gaming experiences. Valve has today announced its survey for steam for linux beta.
Valve Software writes: We're looking for Linux gamers to install and test our new Steam for Linux client. We are primarily interested in experienced Linux users.
In order to take the survey, you need to first login with your Steam account to link your response with your Steam ID. Once you are ready for beta testing, you can login from this link. 1000 steam users will be chosen based upon the responses in the survey.
Steam community recently got its dedicated linux section and good for us, all these signs seem to indicate that Valve is trying to extend its market over the linux platform.
Read more...
Bookmark this post: |
|
Linux Cat Command Examples
The cat command displays the content of file on the standard output. If multiple files are specified, the contents of all files will be concatenated and then displayed on the standard output. Likewise, if no file is specified, it will assume standard input (keyboard input) as the input to the command. The Ctrl + d is the shortcut used to save the contents in the appropriate output placeholder specified and exit the cat command.
Print content of file in standard output
samar@samar-Techgaun:~$ cat workers.txt
List of workers, designations & salary (in K):
Kshitiz Director 30
Bikky Manager  20


Abhis Sweeper  10
Rajesh Guard  12
Print line numbers
samar@samar-Techgaun:~$ cat -n workers.txt
     1 List of workers, designations & salary (in K):
     2 Kshitiz Director 30
     3 Bikky Manager  20
     4
     5
     6 Abhis Sweeper  10
     7 Rajesh Guard  12
Print line numbers for non-empty lines only
samar@samar-Techgaun:~$ cat -b workers.txt
     1 List of workers, designations & salary (in K):
     2 Kshitiz Director 30
     3 Bikky Manager  20


     4 Abhis Sweeper  10
     5 Rajesh Guard  12
Create a new file
samar@samar-Techgaun:~$ cat > newfile.txt
We can create text files
using cat command
once u finish writing,
press ctrl+d to save file
^d
Display content of multiple files
samar@samar-Techgaun:~$ cat workers.txt newfile.txt
List of workers, designations & salary (in K):
Kshitiz Director 30
Bikky Manager  20


Abhis Sweeper  10
Rajesh Guard  12
We can create text files
using cat command
once u finish writing,
press ctrl+d to save file
Combine multiple files to new file
samar@samar-Techgaun:~$ cat workers.txt newfile.txt > concat.txt
samar@samar-Techgaun:~$ cat concat.txt
List of workers, designations & salary (in K):
Kshitiz Director 30
Bikky Manager  20


Abhis Sweeper  10
Rajesh Guard  12
We can create text files
using cat command
once u finish writing,
press ctrl+d to save file
Append data to existing file
samar@samar-Techgaun:~$ cat >> newfile.txt
New line added
^d
samar@samar-Techgaun:~$ cat newfile.txt
We can create text files
using cat command
once u finish writing,
press ctrl+d to save file
New line added
Alternatively, you can use the syntax below if you wish to create new file combining the content of already existing file and standard input.
samar@samar-Techgaun:~$ cat newfile.txt - > myfile
thanks for everything
^d
samar@samar-Techgaun:~$ cat myfile
We can create text files
using cat command
once u finish writing,
press ctrl+d to save file
New line added
thanks for everything
Another possibility is to combine two text files with data from standard input (keyboard) in-between the contents of these two text files.
samar@samar-Techgaun:~$ cat workers.txt - newfile.txt > myfile

----------------------------------

^d
samar@samar-Techgaun:~$ cat myfile
List of workers, designations & salary (in K):
Kshitiz Director 30
Bikky Manager  20


Abhis Sweeper  10
Rajesh Guard  12

----------------------------------

We can create text files
using cat command
once u finish writing,
press ctrl+d to save file
New line added
Display $ sign at the end of each line
samar@samar-Techgaun:~$ cat -E workers.txt
List of workers, designations & salary (in K):$
Kshitiz Director 30$
Bikky Manager  20$
$
$
Abhis Sweeper  10$
Rajesh Guard  12$
Display ^I sign instead of TABs
samar@samar-Techgaun:~$ cat -T workers.txt
List of workers, designations & salary (in K):
Kshitiz^IDirector^I30
Bikky^IManager^I^I20


Abhis^ISweeper^I^I10
Rajesh^IGuard^I^I12
Display files with non-printing characters
samar@samar-Techgaun:~$ cat -v /bin/nc
In the example above, the non-printing characters are replaced with ^ and M- notation except for line breaks and TABs. This can be used to display the contents of binary files which would otherwise have shown gibberish text all over the console.
Show contents with tabs, line breaks and non-printing characters
samar@samar-Techgaun:~$ cat -A /bin/nc
The tab will be substituted by ^I, line breaks with $ and non-printing characters with ^ and M- notation. Actually, the -A switch is equivalent to -vET switch.
Supress/squeeze repeated empty lines
samar@samar-Techgaun:~$ cat -s workers.txt
List of workers, designations & salary (in K):
Kshitiz Director 30
Bikky Manager  20

Abhis Sweeper  10
Rajesh Guard  12
Using -s switch, we can squeeze repeatedly occurring blank lines and replace all the adjacent empty lines with a single empty line in the output. This might be useful to reformat a file with several empty lines in-between (eg. cat -s workers.txt > formatted_workers.txt).
Display last line first
samar@samar-Techgaun:~$ tac workers.txt
Rajesh Guard  12
Abhis Sweeper  10

Bikky Manager  20
Kshitiz Director 30
List of workers, designations & salary (in K):
It is the tac, not the cat that is doing the magic but just thought that this is the right place to make a note about this little known command.
Edit: Added here-doc examples. Thanks rho dai for pointing me this.
Parameter substitution using here-document strings
samar@samar-Techgaun:~$ cat > test << TEST
samar@samar-Techgaun:~$ I am $USER. My home is $HOME
samar@samar-Techgaun:~$ I came here from $OLDPWD
samar@samar-Techgaun:~$ TEST
samar@samar-Techgaun:~$ cat test
I am samar. My home is /home/samar
I came here from /home/samar/Downloads
Command expansion example
samar@samar-Techgaun:~$ cat > test << TEST
samar@samar-Techgaun:~$ $(ls /)
samar@samar-Techgaun:~$ TEST
samar@samar-Techgaun:~$ cat test
bin
boot
cdrom
dev
etc
home
initrd.img
initrd.img.old
lib
lost+found
media
mnt
opt
proc
root
run
sbin
selinux
srv
sys
tmp
usr
var
vmlinuz
vmlinuz.old
Parameter substitution turned off
samar@samar-Techgaun:~$ cat > test << 'TEST'
samar@samar-Techgaun:~$ I am $USER. My home is $HOME
samar@samar-Techgaun:~$ I came here from $OLDPWD
samar@samar-Techgaun:~$ TEST
samar@samar-Techgaun:~$ cat test
I am $USER. My home is $HOME
I came here from $OLDPWD
Note the difference between the last example and previous two examples. Enclosing the limit string TEST with quotes prevents the substitutions and expansions.
I hope these examples are useful. :)
Read more...
Bookmark this post: |
|
Sunday 21 October 2012
Ubuntu Studio - Ubuntu Derivation For Audio Video & Graphics Editor
Ubuntu Studio is a variant of Ubuntu aimed at the GNU/Linux audio, video and graphic enthusiast as well as professional. The distribution provides a collection of open-source applications available for multimedia creation.
Ubuntu Studio is a free, open source and powerful operating system created for the creative people to create exceptional arts using right sets of tools for audio, video and graphical editing. As an officially recognized derivative of Ubuntu, Ubuntu Studio is supported by Canonical Ltd.
Ubuntu Studio is released every six months, but a long term release (LTS) version is released only every 2 years.
Audio apps include Jack, Ardour, Audacity, QTractor, Hydrogen, Yoshimi, Rakarrack, Gladish, Puredata and several other apps available for download.
Graphical apps include Blender, Inkscape, GIMP, MyPaint and several other apps.
Video apps include Openshot video editor, FFMPEG, DVDStyler, and other apps.
Photography apps include Darktable, Shotwell, and several other useful apps.
Calibre, Scribus and LibreOffice and other apps are available to suffice publishing needs.
Useful Links
Ubuntu Studio HOME
Ubuntu Studio Download
Ubuntu Studio Documentation
Read more...
Bookmark this post: |
|
Subscribe to:
Posts (Atom)