Showing posts with label linux. Show all posts
Showing posts with label linux. Show all posts
Saturday 16 June 2012
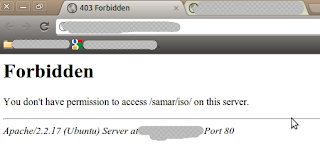
IP Address Based Restriction Using Htaccess File
Sometimes you need to restrict access to files in your webserver to certain IP address or IP range only. In such case, you can apply a simple .htaccess rule and this post provides an information on how to make IP based restriction Using .htaccess.
First, be sure to enable use of htaccess in apache in your distro.
An example of .htaccess file that will block requests from all IP addresses but the subnet of 192.168.0.0/16 is as below:
Similarly, an example of .htaccess file that will allow requests from all IP addresses but the subnet of 192.168.0.0/16 is as below:
You can also specify the individual IP addresses instead of the entire subnet according to your need. Also, note that there should be no space after the comma between allow,deny.
Once you create the .htaccess file, make sure you've provided proper permission to it.
Once you have made the .htaccess file and provided the proper permission, you might need to restart the apache server(but per directory .htaccess does not require reloading the apache in most cases) so that new configurations will show an effect.
I hope this comes handy :)
Read more...
First, be sure to enable use of htaccess in apache in your distro.

An example of .htaccess file that will block requests from all IP addresses but the subnet of 192.168.0.0/16 is as below:
<limit GET>
order deny,allow
deny from all
allow from 192.168
</limit>
order deny,allow
deny from all
allow from 192.168
</limit>
Similarly, an example of .htaccess file that will allow requests from all IP addresses but the subnet of 192.168.0.0/16 is as below:
<limit GET>
order allow,deny
allow from all
deny from 192.168
</limit>
order allow,deny
allow from all
deny from 192.168
</limit>
You can also specify the individual IP addresses instead of the entire subnet according to your need. Also, note that there should be no space after the comma between allow,deny.
Once you create the .htaccess file, make sure you've provided proper permission to it.
samar@Techgaun:/var/www/samar$ chmod 0644 .htaccess
Once you have made the .htaccess file and provided the proper permission, you might need to restart the apache server(but per directory .htaccess does not require reloading the apache in most cases) so that new configurations will show an effect.
samar@Techgaun:/var/www/samar$ sudo service apache2 reload
I hope this comes handy :)
Read more...
Bookmark this post: | 
|
Friday 15 June 2012
How To Enable Use Of Htaccess In Apache In Ubuntu
This How To provides a detail on how to enable use of .htaccess file in apache in ubuntu and the similar flavors of linux distribution.
To enable use of .htaccess, you can edit the /etc/apache2/sites-available/default file. Search for the portion which contains the following lines or something similar to that(The bold line is almost always present):
All you have to do is change the bold line above to:
Now you will need to restart the apache service so that the effect of change in configuration takes place. Enter the following command to restart the apache service:
Now your .htaccess files will start to work in ubuntu. :)
Read more...
To enable use of .htaccess, you can edit the /etc/apache2/sites-available/default file. Search for the portion which contains the following lines or something similar to that(The bold line is almost always present):
<Directory /var/www/>
Options Indexes FollowSymLinks MultiViews
AllowOverride None
Order allow,deny
allow from all
</Directory>
Options Indexes FollowSymLinks MultiViews
AllowOverride None
Order allow,deny
allow from all
</Directory>
All you have to do is change the bold line above to:
<Directory /var/www/>
Options Indexes FollowSymLinks MultiViews
AllowOverride All
Order allow,deny
allow from all
</Directory>
Options Indexes FollowSymLinks MultiViews
AllowOverride All
Order allow,deny
allow from all
</Directory>
Now you will need to restart the apache service so that the effect of change in configuration takes place. Enter the following command to restart the apache service:
samar@Techgaun:~$ sudo service apache2 reload
Now your .htaccess files will start to work in ubuntu. :)
Read more...
Bookmark this post: |
|
Recover Deleted Files From An NTFS Volume Using Ntfsundelete
Ntfsundelete is a part of ntfsprogs, a suite of NTFS utilities based around a shared library. It lets us recover the deleted files from any NTFS volumes without making any changes in the NTFS volume itself.
Generally when a file is deleted from disks, it is some kind of pointer to the physical file that gets deleted and the actual content still remains in the disk unless it is overwritten by new files so it is possible to recover those files.
ntfsundelete has three modes of operation: scan, undelete and copy. By default, it will run in the scan mode which simply reads an NTFS volume and looks for the files that have been deleted.

To use ntfsundelete, you'll have to install the ntfsprogs suite with following command in ubuntu and debian-based distros:
You'll have to first figure out which drive you want to recover. A handy command for this is:
Once you know the NTFS volume you want to recover, you can first run the scan mode to list the filenames that can be recovered.
The optional -f switch can be specified for the forceful scanning. There is a nice percentage field which gives the information on how much of the file can be recovered. You can apply the time and percentage filters to scan specific files. For example, you can use the following command to search for the files which can be recovered 100%
And, you can apply the time filter to list the files altered/deleted after the specified time. For example, following command will scan and list the files deleted in the last 14 days.
Other suffices you can use are d, w, m, y for days, weeks, months or years ago respectively.
Once you get the files to be recovered, you can use the -u switch to undelete or recover the files. An example of recovering files by pattern matching is as below:
Similarly you can recover by providing inode or inodes range using the -i switch. You can get the inode values from the first column in the scan mode.
Read more...
Generally when a file is deleted from disks, it is some kind of pointer to the physical file that gets deleted and the actual content still remains in the disk unless it is overwritten by new files so it is possible to recover those files.
ntfsundelete has three modes of operation: scan, undelete and copy. By default, it will run in the scan mode which simply reads an NTFS volume and looks for the files that have been deleted.

To use ntfsundelete, you'll have to install the ntfsprogs suite with following command in ubuntu and debian-based distros:
samar@Techgaun:~$ sudo apt-get install ntfsprogs
You'll have to first figure out which drive you want to recover. A handy command for this is:
samar@Techgaun:~$ sudo fdisk -l
Once you know the NTFS volume you want to recover, you can first run the scan mode to list the filenames that can be recovered.
samar@Techgaun:~$ sudo ntfsundelete /dev/sda4
The optional -f switch can be specified for the forceful scanning. There is a nice percentage field which gives the information on how much of the file can be recovered. You can apply the time and percentage filters to scan specific files. For example, you can use the following command to search for the files which can be recovered 100%
samar@Techgaun:~$ sudo ntfsundelete -p 100 /dev/sda4
And, you can apply the time filter to list the files altered/deleted after the specified time. For example, following command will scan and list the files deleted in the last 14 days.
samar@Techgaun:~$ sudo ntfsundelete -p 100 -t 2d /dev/sda4
Other suffices you can use are d, w, m, y for days, weeks, months or years ago respectively.
Once you get the files to be recovered, you can use the -u switch to undelete or recover the files. An example of recovering files by pattern matching is as below:
samar@Techgaun:~$ sudo ntfsundelete -u -m *.jpg /dev/sda4
Similarly you can recover by providing inode or inodes range using the -i switch. You can get the inode values from the first column in the scan mode.
samar@Techgaun:~$ sudo ntfsundelete -u -i 161922 /dev/sda4
Read more...
Bookmark this post: |
|
Monday 11 June 2012
Graphical Frontends To Sopcast Client For Linux
As all of you know the official Sopcast client for linux is only the command line version and many people find it difficult to use the CLI version. However, many good people have made an effort to write the graphical frontends to the Sopcast client for linux. Here you will find some of such GUI frontends for sopcast.
Sopcast Player: SopCast Player is designed to be an easy to use Linux GUI front-end for the p2p streaming technology developed by SopCast. SopCast Player features an integrated video player, a channel guide, and bookmarks. Once SopCast Player is installed it simply "just works" with no required configuration.
qsopcast: qsopcast is a QT GUI front-end of the Linux command line executive of P2P TV sopcast.
gsopcast: gsopcast is a GTK based GUI front-end for p2p TV sopcast.
TV-Maxe: TV-MAXE is an application which provides the ability to watch TV stations and listen radio via different streams, such is SopCast. Currently it has a large number of channels, both romanian and international.
SCPlayer: SCPlayer is a simple and lightweight GUI frontend for sopcast supporting only linux GNOME3 platform.
Pysopcast: It is a simple GUI for sopcast made using PyGTK.
totem-sopcast: A totem plugin to let you browse and play sopcast streams.
wxsopcast: A sopcast GUI for linux written in python and wxPython. Note that the channel URL needs to be changed to http://www.sopcast.com/gchlxml at first.
jsopcast: jsopcast is a simple GUI to see P2P TV sopcast made in Java.
If you know of any other GUI frontend for sopcast, please feel free to leave a comment. :)
Read more...
Bookmark this post: |
|
Sunday 10 June 2012
Sopcast Player With GUI In Linux
SopCast is a simple, free way to broadcast video and audio or watch the video and listen to radio on the Internet. Adopting P2P(Peer-to-Peer) technology, It is very efficient and easy to use. The GUI for sopcast player for linux works pretty well and this post gives you the step by step process of installation of sopcast player in linux.

Follow the steps as below for easy installation under ubuntu. Instructions should be similar in many variants:

Now everything should work fine. I hope this helps. :)
Read more...
Follow the steps as below for easy installation under ubuntu. Instructions should be similar in many variants:
samar@Techgaun:~/Desktop$ su
root@Techgaun:/home/samar/Desktop/# mkdir sopcast && cd sopcast/
root@Techgaun:/home/samar/Desktop/sopcast# wget http://www.sopcast.com/download/libstdcpp5.tgz
root@Techgaun:/home/samar/Desktop/sopcast# wget http://sopcast-player.googlecode.com/files/sp-auth-3.2.6.tar.gz
root@Techgaun:/home/samar/Desktop/sopcast# wget http://sopcast-player.googlecode.com/files/sopcast-player-0.8.5.tar.gz
root@Techgaun:/home/samar/Desktop/sopcast# tar -xvf sopcast-player-0.8.5.tar.gz
root@Techgaun:/home/samar/Desktop/sopcast# tar -xvf sp-auth-3.2.6.tar.gz
root@Techgaun:/home/samar/Desktop/sopcast# tar -xvf libstdcpp5.tgz
root@Techgaun:/home/samar/Desktop/sopcast# apt-get install gettext python-setuptools libvlc-dev
root@Techgaun:/home/samar/Desktop/sopcast# cd sopcast-player
root@Techgaun:/home/samar/Desktop/sopcast# make
root@Techgaun:/home/samar/Desktop/sopcast# make install
root@Techgaun:/home/samar/Desktop/sopcast# cd ../sp-auth
root@Techgaun:/home/samar/Desktop/sopcast/sp-auth# cp sp-sc-auth /usr/bin/
root@Techgaun:/home/samar/Desktop/sopcast# cd ../usr/lib/
root@Techgaun:/home/samar/Desktop/sopcast/usr/lib/# cp -a libstdc++.so.5* /usr/lib/
root@Techgaun:/home/samar/Desktop/sopcast/usr/lib/# sopcast-player

Now everything should work fine. I hope this helps. :)
Read more...
Bookmark this post: |
|
Sunday 27 May 2012
Accelerate Download Speed In Linux Using Axel
Axel is a lightweight command line download accelerator for linux. Axel is a program that downloads a file from a FTP or HTTP server through multiple connection, each connection downloads its own part of the file.
Unlike most other programs, Axel downloads all the data directly to the destination file, using one single thread. It just saves some time at the end because the program doesn't have to concatenate all the downloaded parts.
Axel tries to accelerate downloads by using multiple connections (possibly to multiple servers) for one download. Because of its size, it might be very useful on bootdisks or other small systems as a wget replacement.
One useful implementation of axel is in the apt-fast tool, a fusion of apt-get and axel to accelerate downloads of packages.
Installation under ubuntu and other debian distros: Open the terminal and type:
Similarly, a graphical frontend axel-kapt is also available for download for GUI lovers. Also, flashgot plugin for firefox lets you make use of axel to download files. I should say, axel is a small yet good download accelerator for linux systems.
Read more...
Unlike most other programs, Axel downloads all the data directly to the destination file, using one single thread. It just saves some time at the end because the program doesn't have to concatenate all the downloaded parts.
Axel tries to accelerate downloads by using multiple connections (possibly to multiple servers) for one download. Because of its size, it might be very useful on bootdisks or other small systems as a wget replacement.
One useful implementation of axel is in the apt-fast tool, a fusion of apt-get and axel to accelerate downloads of packages.
Installation under ubuntu and other debian distros: Open the terminal and type:
sudo apt-get install axel
Similarly, a graphical frontend axel-kapt is also available for download for GUI lovers. Also, flashgot plugin for firefox lets you make use of axel to download files. I should say, axel is a small yet good download accelerator for linux systems.
Read more...
Bookmark this post: |
|
Tuesday 22 May 2012
Setting Up Ncell Connect In Linux
Today I got a NCELL Connect device from my junior friend and did a quick PPP setup on linux. Later thought that this would be useful for other guys who use ubuntu(thats what I'm using) and other distros and hence am posting the steps on setting up Ncell connect in linux.
1. Install wvdial. Wvdial is a dialer that lets you to make a PPP connection in order to connect to the internet. Fire up the terminal and run the following command:
Optionally you could also install gnome-ppp(sudo apt-get install gnome-ppp) for GUI but wvdial does all the job.
2. Edit the /etc/wvdial.conf, the configuration file for wvdial which requires appropriate setting for NCell connect and replace all the text with following data.
In the above process, you can run the wvdialconf command to see if your Huawei card is being detected. The Modem = line may require appropriate value.
3. While your device is plugged in, type the following command and note the line containing huawei.
We are concerned with the vendor and product id. In the above information, 12d1 is the vendor ID and 1446 is the product id. Now perform the following in the terminal:
4. Now we must be all good. All we have to do is dial the connection. Type the following in the terminal:
If everything is fine, your connection will be successful showing the information such as IP address and primary and secondary DNS information. I hope this helps. Enjoy the NCELL connect in linux :)
Read more...
1. Install wvdial. Wvdial is a dialer that lets you to make a PPP connection in order to connect to the internet. Fire up the terminal and run the following command:
samar@Techgaun:~$ sudo apt-get install wvdial
Optionally you could also install gnome-ppp(sudo apt-get install gnome-ppp) for GUI but wvdial does all the job.
2. Edit the /etc/wvdial.conf, the configuration file for wvdial which requires appropriate setting for NCell connect and replace all the text with following data.
[Dialer Defaults]
Stupid Mode = 1
Modem Type = Analog Modem
ISDN = 0
Phone = *99#
Modem = /dev/ttyUSB0
Username = web
Dial Command = ATDT
Password = web
Baud = 460800
Init1 = ATZ
Init2 = ATQ0 V1 E1 S0=0 &C1 &D2 +FCLASS=0
Stupid Mode = 1
Modem Type = Analog Modem
ISDN = 0
Phone = *99#
Modem = /dev/ttyUSB0
Username = web
Dial Command = ATDT
Password = web
Baud = 460800
Init1 = ATZ
Init2 = ATQ0 V1 E1 S0=0 &C1 &D2 +FCLASS=0
In the above process, you can run the wvdialconf command to see if your Huawei card is being detected. The Modem = line may require appropriate value.
3. While your device is plugged in, type the following command and note the line containing huawei.
samar@Techgaun:~$ lsusb
Bus 002 Device 005: ID 12d1:1446 Huawei Technologies Co., Ltd. E1552 (HSPA modem)
Bus 002 Device 004: ID 0408:03f1 Quanta Computer, Inc.
Bus 002 Device 003: ID 138a:0005 DigitalPersona, Inc
Bus 002 Device 002: ID 8087:0020 Intel Corp. Integrated Rate Matching Hub
Bus 002 Device 001: ID 1d6b:0002 Linux Foundation 2.0 root hub
Bus 001 Device 025: ID 04f3:0210 Elan Microelectronics Corp. AM-400 Hama Optical Mouse
Bus 001 Device 002: ID 8087:0020 Intel Corp. Integrated Rate Matching Hub
Bus 001 Device 001: ID 1d6b:0002 Linux Foundation 2.0 root hub
We are concerned with the vendor and product id. In the above information, 12d1 is the vendor ID and 1446 is the product id. Now perform the following in the terminal:
samar@Techgaun:~$ sudo modprobe usbserial vendor=0x12d1 product=0x1446
4. Now we must be all good. All we have to do is dial the connection. Type the following in the terminal:
samar@Techgaun:~$ sudo wvdial
If everything is fine, your connection will be successful showing the information such as IP address and primary and secondary DNS information. I hope this helps. Enjoy the NCELL connect in linux :)
Read more...
Bookmark this post: |
|
Saturday 7 April 2012
Sexy SSH Tricks For Linux Geeks
Previously I had posted on mounting filesystem over SSh and now its time for yet another post on cool SSh tricks.
So lets see few of the several SSH tricks that we either need to use or can use for fun and making stuffs easier.

Do not supply any passphrase and keep on pressing ENTER if you are looking for password-free SSH login. This will create two files id_dsa(private key) and id_dsa.pub(public key). All we have to do is copy the public key to the remote server computer and then add the content of public key to the list of authorized keys as below(or using nano or whatever you find easier):
You can even supply passphrase if you want and this will make authentication more secure. In that case, be sure to set the following value in /etc/ssh/sshd_config:
Similarly, we can encrypt the SSH sessions using one of the different available block ciphers: aes128-ctr,aes192-ctr,aes256-ctr,arcfour256,arcfour128,aes128-cbc,3des-cbc. IMHO, using aes256-ctr would be sufficiently secure due to 256 bits key size. Below is an example of using both the compression and encryption while establishing the SSH connection.
To prevent the last login status, simply change and set as following in the configuration file(/etc/ssh/sshd_config):
And also, change the content of the file /etc/motd and /var/run/motd which by default contains the banner message that is displayed by SSH.
So that's the end. Of course, there are more sexy SSH tricks which I'll cover up once I get some free time. Also, share what you have :)
Read more...
So lets see few of the several SSH tricks that we either need to use or can use for fun and making stuffs easier.

Password-less SSH
No matter how convinient it is to use SSH to connect to remote server, people tend to seek for more ease and typing passwords each time you are on interactive shell is something most users hate. Moreover, you can even prevent the bruteforcing attacks by using password-free SSH with small extra configuration change. First we need to generate a pair of keys by using the ssh-keygen tool. ssh-keygen generates, manages and converts authentication keys for ssh. ssh-keygen can create RSA keys for use by SSH protocol version 1 and DSA, ECDSA or RSA keys for use by SSH protocol version 2. In my example, I'll generate DSA keys as below:ssh-keygen -t dsa
Do not supply any passphrase and keep on pressing ENTER if you are looking for password-free SSH login. This will create two files id_dsa(private key) and id_dsa.pub(public key). All we have to do is copy the public key to the remote server computer and then add the content of public key to the list of authorized keys as below(or using nano or whatever you find easier):
cat id_dsa.pub >> ~/.ssh/authorized_keys
You can even supply passphrase if you want and this will make authentication more secure. In that case, be sure to set the following value in /etc/ssh/sshd_config:
PasswordAuthentication no
Mount Filesystem over SSH
This is another useful trick to use while working over SSH. The details on this can be read here.Copy File Over SSH Using SCP
SCP is a SSH based tool that provides an easy way to copy files over SSH. You can copy files from and to SSH server to/from your machine and also copy files from one server to another directly. Check my previous blog post on SCP for further details.Running Graphical Softwares Over SSH
With SSH, you can configure the X11 Forwarding(set to Yes in /etc/ssh/sshd_config for global effect and host-by-host basis in /etc/ssh/ssh_config by setting ForwardX11 yes) which allows us to run the graphical softwares on server over SSH. You can run the graphical softwares over SSH by supplying the -X switch while connecting to the server. An example is shown below:ssh -X samar@192.168.0.1 -p 222
Compressed and Encrypted SSH Sessions
Another good thing to do is compress and encrypt the SSH sessions. Compression is usually a very good idea for slow networks but is not desirable for faster networks where compression and de-compression might cause more overhead. The compression algorithm used by SSH is gzip and requests compression of all data (including stdin, stdout, stderr, and data for forwarded X11 and TCP connections). The default value can be set on a host-by-host basis in the configuration files(/etc/ssh/ssh_config) by setting the Compression option. To enable compression, use the -C switch while connecting to the remote SSH server or set the Compression yes in your config file.Similarly, we can encrypt the SSH sessions using one of the different available block ciphers: aes128-ctr,aes192-ctr,aes256-ctr,arcfour256,arcfour128,aes128-cbc,3des-cbc. IMHO, using aes256-ctr would be sufficiently secure due to 256 bits key size. Below is an example of using both the compression and encryption while establishing the SSH connection.
ssh -c aes256-ctr -C hostel@192.168.0.1
Disable Root Login
Its not a good thing to allow root login in SSH so be sure root login is disabled in your SSH server. This is done by setting the configuration(/etc/ssh/sshd_config) as PermitRootLogin no. What more? Disable the password-based logins and use the key-based login. And to keep script kiddies out, you could change the default port in the configuration.Disable Last Login & Default MOTD
By default, while logging in to the SSH servers like OpenSSH, we will see some kind of banner that includes a MOTD(Message Of The Day) and last login user and time. Disabling these or changing the banner requires two modifications.To prevent the last login status, simply change and set as following in the configuration file(/etc/ssh/sshd_config):
PrintMotd no
PrintLastLog no
PrintLastLog no
And also, change the content of the file /etc/motd and /var/run/motd which by default contains the banner message that is displayed by SSH.
So that's the end. Of course, there are more sexy SSH tricks which I'll cover up once I get some free time. Also, share what you have :)
Read more...
Bookmark this post: |
|
Thursday 5 April 2012
View ASCII Table In Your Linux Terminal
You need not be browsing some online ascii table website or need not download any document containing the list of ASCII characters if you are using linux OS. You can view the ASCII characters set encoded in octal, decimal, and hexadecimal by just opening the terminal.
In order to access the ASCII table, just type:
Isn't it cool to have all the ASCII character sets in your linux terminal?
Read more...
In order to access the ASCII table, just type:
samar@Techgaun:~$ man ascii

Isn't it cool to have all the ASCII character sets in your linux terminal?
Read more...
Bookmark this post: |
|
How To Mount Folder or Filesystem Over SSh
Many times you need to interact a lot with some directory or a filesystem while working remotely on a server over SSh. Things will be way easier if you can mount the remote folder or filesystem over SSh and I am going to show how to do this thing in this very post.
SSHFS (Secure SHell FileSystem) is a file system for Linux (and other operating systems with a FUSE implementation, such as Mac OS X or FreeBSD) capable of operating on files on a remote computer using just a secure shell login on the remote computer. On the local computer where the SSHFS is mounted, the implementation makes use of the FUSE (Filesystem in Userspace) kernel module. The practical effect of this is that the end user can seamlessly interact with remote files being securely served over SSH just as if they were local files on his/her computer. On the remote computer the SFTP subsystem of SSH is used.
SSHFS can be downloaded and installed from HERE. Most linux distros have sshfs in their repositories. You can use the respective package managers to install the sshfs in the client system(i.e. your system).
Ubuntu and debian users can type the following in the terminal to install sshfs:
Once you install sshfs, you are ready to mount the remote files and folders over SSh. The syntax for mounting the remote filesystem/folder is pretty straightforward.
The syntax is: sshfs -p SSHPort [user@]host:[dir] mountpoint
An example of mounting the remote system's /opt directory in my Desktop
Unmounting can be done by using the command as below:
I hope this counts as a useful tips for you. :)
Read more...
SSHFS (Secure SHell FileSystem) is a file system for Linux (and other operating systems with a FUSE implementation, such as Mac OS X or FreeBSD) capable of operating on files on a remote computer using just a secure shell login on the remote computer. On the local computer where the SSHFS is mounted, the implementation makes use of the FUSE (Filesystem in Userspace) kernel module. The practical effect of this is that the end user can seamlessly interact with remote files being securely served over SSH just as if they were local files on his/her computer. On the remote computer the SFTP subsystem of SSH is used.
SSHFS can be downloaded and installed from HERE. Most linux distros have sshfs in their repositories. You can use the respective package managers to install the sshfs in the client system(i.e. your system).
Ubuntu and debian users can type the following in the terminal to install sshfs:
samar@Techgaun:~$ sudo apt-get install sshfs
Once you install sshfs, you are ready to mount the remote files and folders over SSh. The syntax for mounting the remote filesystem/folder is pretty straightforward.
The syntax is: sshfs -p SSHPort [user@]host:[dir] mountpoint
An example of mounting the remote system's /opt directory in my Desktop
samar@Techgaun:~$ sshfs -p 222 kubh@192.168.0.1:/opt/ ~/Desktop/remote/
Unmounting can be done by using the command as below:
samar@Techgaun:~$ fusermount -u ~/Desktop/remote/
I hope this counts as a useful tips for you. :)
Read more...
Bookmark this post: |
|
Monday 2 April 2012
How To Disable Password Prompts For sudo In Ubuntu
If you are one of those linux users who very frequently use the sudo command, you might have been annoyed of entering passwords each time you use this command. However with a very simple tweak, you can change this behaviour and disable the password prompts for the sudo command.

A bit of warning though, do not modify the default behavior of asking for passwords since it would drastically compromise security of your system. Following is the warning given by ubuntu help.
If you disable the sudo password for your account, you will seriously compromise the security of your computer. Anyone sitting at your unattended, logged in account will have complete Root access, and remote exploits become much easier for malicious crackers.
Now you are aware of warning, lets see how this can be done.We need to edit the /etc/sudoers file. Lets first open the file in safe editable mode using the following command:
Using visudo for editing the /etc/sudoers lets us locate the possible errors that may occur while editing the file so always use visudo.
Following is the format of disabling password prompts for specific user.
So if we are to disable password prompts for the user samar, you can make a new line with following entry:
In case you want to let all the users with admin privilege use the sudo command without having to give the password, you can edit the line that says %admin ALL=(ALL) ALL to the following:
Once you add such line for appropriate user, press Ctrl + x and save the changes. You will either have to log out and login back or restart the shell to see the modification in effect.
I hope this is useful. :)
Read more...

A bit of warning though, do not modify the default behavior of asking for passwords since it would drastically compromise security of your system. Following is the warning given by ubuntu help.
If you disable the sudo password for your account, you will seriously compromise the security of your computer. Anyone sitting at your unattended, logged in account will have complete Root access, and remote exploits become much easier for malicious crackers.
Now you are aware of warning, lets see how this can be done.We need to edit the /etc/sudoers file. Lets first open the file in safe editable mode using the following command:
samar@Techgaun:~$ sudo visudo
Using visudo for editing the /etc/sudoers lets us locate the possible errors that may occur while editing the file so always use visudo.
Following is the format of disabling password prompts for specific user.
<username> ALL=NOPASSWD: ALL
So if we are to disable password prompts for the user samar, you can make a new line with following entry:
samar ALL=(ALL)NOPASSWD: ALL
In case you want to let all the users with admin privilege use the sudo command without having to give the password, you can edit the line that says %admin ALL=(ALL) ALL to the following:
%admin ALL=(ALL)NOPASSWD: ALL
Once you add such line for appropriate user, press Ctrl + x and save the changes. You will either have to log out and login back or restart the shell to see the modification in effect.
I hope this is useful. :)
Read more...
Bookmark this post: |
|
Saturday 31 March 2012
nmbscan - Network Shares Scanner Based On NMB/SMB/NetBIOS Protocol
NMB Scanner scans the shares of a NetBIOS/SMB network, using the NMB/SMB/NetBIOS protocols. It is useful for acquiring information on a local area network for such purposes as security auditing.
It can obtain such information as NMB/SMB/NetBIOS/Windows hostname, IP address, IP hostname, ethernet MAC address, Windows username, NMB/SMB/NetBIOS/Windows domain name, and master browser. It can discover all the NMB/SMB/NetBIOS/Windows hosts on a local area network by using the hosts lists maintained by master browsers.
You can download the version 1.2.6 of nmbscan tool from HERE.
After downloading, extract the files by typing:
Running nmbscan shows pretty much of information about the usage.
You can figure out the command line switches as per your necessity while using the tool. I hope this tool counts as useful for you. :)
Read more...
It can obtain such information as NMB/SMB/NetBIOS/Windows hostname, IP address, IP hostname, ethernet MAC address, Windows username, NMB/SMB/NetBIOS/Windows domain name, and master browser. It can discover all the NMB/SMB/NetBIOS/Windows hosts on a local area network by using the hosts lists maintained by master browsers.
You can download the version 1.2.6 of nmbscan tool from HERE.
After downloading, extract the files by typing:
mkdir nmbscan && tar -xvf nmbscan-1.2.6.tar.gz --directory nmbscan
Running nmbscan shows pretty much of information about the usage.
samar@Techgaun:~/Downloads/nmbscan$ ./nmbscan
nmbscan version 1.2.6 - Techgaun - Sat Mar 31 00:04:15 NPT 2012

usage :
 ./nmbscan -L
  -L show licence agreement (GPL)

 ./nmbscan {-d|-m|-a}
  -d show all domains
  -m show all domains with master browsers
  -a show all domains, master browsers, and hosts

 ./nmbscan {-h|-n} host1 [host2 [...]]
  -h show information on hosts, known by ip name/address
  -n show information on hosts, known by nmb name
You can figure out the command line switches as per your necessity while using the tool. I hope this tool counts as useful for you. :)
Read more...
Bookmark this post: |
|
Wednesday 28 March 2012
How To Fix NTFS Disk Partition From Linux
If you have problematic NTFS partition in your hard disk, you can fix many of the common NTFS inconsistencies from linux. Linux consists of a set of tools that allow you to manipulate and perform different types of actions on the NTFS partitions. This package is known as ntfsprogs.
If your linux distribution does not consist of the ntfsprogs package, you can install it by using the package manager tool that comes in your distribution or from command line. Debian and ubuntu users can type the following command:
Now to fix the NTFS drive, we must first determine the partition we want to fix. We can use the simplest one, the fdisk utility to determine the partition of hard disk we want to fix. Type the following command to view the list of partitions:
If you have more than one HDDs and want to view partitions of specific HDD, you can always do so by issuing the commands such as sudo fdisk -l /dev/sda or sudo fdisk -l /dev/sdb and so on.
Now lets suppose its /dev/sdb5 we need to fix. We can now use the ntfsfix command that comes in the ntfsprogs package.
Note that it only repairs some fundamental NTFS inconsistencies, resets the NTFS journal file and schedules an NTFS consistency check for the first boot into Windows. You may run ntfsfix on an NTFS volume if you think it was damaged by Windows or some other way and it cannot be mounted.
Read more...
If your linux distribution does not consist of the ntfsprogs package, you can install it by using the package manager tool that comes in your distribution or from command line. Debian and ubuntu users can type the following command:
sudo apt-get install ntfsprogs
Now to fix the NTFS drive, we must first determine the partition we want to fix. We can use the simplest one, the fdisk utility to determine the partition of hard disk we want to fix. Type the following command to view the list of partitions:
sudo fdisk -l
If you have more than one HDDs and want to view partitions of specific HDD, you can always do so by issuing the commands such as sudo fdisk -l /dev/sda or sudo fdisk -l /dev/sdb and so on.
Now lets suppose its /dev/sdb5 we need to fix. We can now use the ntfsfix command that comes in the ntfsprogs package.
sudo ntfsprogs /dev/sdb5
Note that it only repairs some fundamental NTFS inconsistencies, resets the NTFS journal file and schedules an NTFS consistency check for the first boot into Windows. You may run ntfsfix on an NTFS volume if you think it was damaged by Windows or some other way and it cannot be mounted.
Read more...
Bookmark this post: |
|
Sunday 11 March 2012
Determine Directory Size From Terminal In Linux [How To]
Sometimes you are working on command line and you want to find the total size of any directory. An instance is while working over SSh. Here is a technique on how you can determine the size of any directory from terminal.
du command lets us estimate the file space usage and can be recursively used for directories as well. This command can also be useful if you want to find the folder sizes of each subdirectories in any specified directory, something that would have been hard to achieve from the GUI.
To find the total size of a directory, use the -sch switch as below:
The screenshot below will help you understand more clearly:

If you would like to see some more details like the size of each subdirectory, use the -hc switch as below:
Check the screenshot below:

The du command provides more advanced stuffs such as exclusions of files and directories and depths for determining size. I hope this helps you. :)
Read more...
du command lets us estimate the file space usage and can be recursively used for directories as well. This command can also be useful if you want to find the folder sizes of each subdirectories in any specified directory, something that would have been hard to achieve from the GUI.
To find the total size of a directory, use the -sch switch as below:
samar@Techgaun:~/Desktop/samar$ du -sch directory_name
The screenshot below will help you understand more clearly:
If you would like to see some more details like the size of each subdirectory, use the -hc switch as below:
samar@Techgaun:~/Desktop/samar$ du -hc directory_name
Check the screenshot below:

The du command provides more advanced stuffs such as exclusions of files and directories and depths for determining size. I hope this helps you. :)
Read more...
Bookmark this post: |
|
Finding Prime Factors Of A Number From Linux Terminal
Linux is awesome because of its powerful commanline interface from where you can do any tasks of varied complexities. I've been posting different command line tricks for system administrations & stuffs like that. But this time I am posting a little command line trick to find the prime factors of any number.
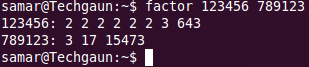
Linux provides a command factor that lets you find the prime factors of any number. So if you are into mathematics and working on prime factorizations, why worry? Just open the terminal and use the factor command.
This command takes any number of integer values as the argument and prints the prime factor of each of them. If no number is specified, it takes the value from standard input.
More information on factor command: The factor command makes use of the Pollard Rho algorithm which is suitable for numbers with relatively small factors. It is not quite good for computing factors of large numbers whose factors are not small values.
Read more...

Linux provides a command factor that lets you find the prime factors of any number. So if you are into mathematics and working on prime factorizations, why worry? Just open the terminal and use the factor command.
This command takes any number of integer values as the argument and prints the prime factor of each of them. If no number is specified, it takes the value from standard input.
samar@Techgaun:~$ factor 2056 1234567
More information on factor command: The factor command makes use of the Pollard Rho algorithm which is suitable for numbers with relatively small factors. It is not quite good for computing factors of large numbers whose factors are not small values.
Read more...
Bookmark this post: |
|
Sunday 19 February 2012
Delete All X-Chat Logs From Ubuntu
If you want to clear all the channel and personal chat logs from the X-Chat, this is a small piece of information on how to do that. In this example, I am showing how to delete the X-chat log in ubuntu and similar distributions.
Well I connect to IRC channels so often using X-chat gnome client that my chat windows are usually filled up with older chats. Also, for some unknown reason, unchecking Log Conversations checkbox in the Edit - Preferences is not working for me. And I usually hate the old chat logs coming up and of course, due to privacy concerns, I regularly delete the channel logs of X-Chat. All the chat logs in x-chat2 are recorded in the ~/.xchat2/scrollback/ folder with network names as the sub folders. So to delete the logs, all you have to do is use the rm command as below:
This will delete all the chat logs but in case you want to delete logs of specific networks or channel or user, just navigate to the scrollback directory and choose the network you wish to delete and issue the rm command for that network.
*Note: This little FYI guide was written by taking the version I've as the reference. Your version could even have the option for clearing the logs but I'm not aware of any such functionality in my version. I hope this helps :)
Read more...
Well I connect to IRC channels so often using X-chat gnome client that my chat windows are usually filled up with older chats. Also, for some unknown reason, unchecking Log Conversations checkbox in the Edit - Preferences is not working for me. And I usually hate the old chat logs coming up and of course, due to privacy concerns, I regularly delete the channel logs of X-Chat. All the chat logs in x-chat2 are recorded in the ~/.xchat2/scrollback/ folder with network names as the sub folders. So to delete the logs, all you have to do is use the rm command as below:
rm -rf ~/.xchat2/scrollback/*
This will delete all the chat logs but in case you want to delete logs of specific networks or channel or user, just navigate to the scrollback directory and choose the network you wish to delete and issue the rm command for that network.
*Note: This little FYI guide was written by taking the version I've as the reference. Your version could even have the option for clearing the logs but I'm not aware of any such functionality in my version. I hope this helps :)
Read more...
Bookmark this post: |
|
Friday 17 February 2012
5 Cool and Useful Linux Command Line Tricks
Well using linux is fun and working on linux terminal is even more fun. Learning to use linux terminal and commands can prove very useful for personal as well as enterprise purpose. Today I'm going to talk about few cool and crazy linux commands that are less likely to be known by the average computer user.
1) The !$ trick: The !$ is a type of event designator that is present in bash as the feature. I'm not sure if other shells support it but bash does, for sure(I heard event designators are bash-specific). Anyway, !$ saves the last string from the previous command you've entered. The session in bash below shows what it actually does:
So when we give the mkdir test command, the !$ holds the value test So when we do cd !$, !$ is replaced by the string test which is the last string in last entered command.
2) The Don't Save This Command trick: Prepending your command with one or more space(<space>command) will not save the command in the bash history. This trick can be quite useful while doing password related stuffs and while sneaking in your friend's laptop.
3) The Oh! I forgot sudo trick: Well this is one of my favorite tricks and I named it so because I tend to forget to put sudo while running many commands and then I use this trick to prepend sudo at the beginning of the command. Below is the session when I used this trick recently.
As shown above, the !! is just another event designator. The !! actually holds the last used command and this can be alternatively specified as !-1. The !-1 version can be actually generalized to traverse back to history i.e. you can get any command in your history by using !-n convention.
4) The Clean up Terminal trick: Sometimes you open the binary and gibberish data and your terminal looks so ugly and needs some cleanup. In such cases, the command reset can be used which actually does is initialize the terminal.
5) Run previous command by replacing one string with another: Using the syntax ^abc^xyz^, you can run the previous command by replacing the string abc by the string xyz. The example below shows how I used the cat command after using the ls command. Its just an example, you could really make use of this trick for longer commands.
Read more...
1) The !$ trick: The !$ is a type of event designator that is present in bash as the feature. I'm not sure if other shells support it but bash does, for sure(I heard event designators are bash-specific). Anyway, !$ saves the last string from the previous command you've entered. The session in bash below shows what it actually does:
samar@Techgaun:~/Desktop$ mkdir test
samar@Techgaun:~/Desktop$ cd !$
cd test
samar@Techgaun:~/Desktop/test$
samar@Techgaun:~/Desktop$ cd !$
cd test
samar@Techgaun:~/Desktop/test$
So when we give the mkdir test command, the !$ holds the value test So when we do cd !$, !$ is replaced by the string test which is the last string in last entered command.
2) The Don't Save This Command trick: Prepending your command with one or more space(<space>command) will not save the command in the bash history. This trick can be quite useful while doing password related stuffs and while sneaking in your friend's laptop.
3) The Oh! I forgot sudo trick: Well this is one of my favorite tricks and I named it so because I tend to forget to put sudo while running many commands and then I use this trick to prepend sudo at the beginning of the command. Below is the session when I used this trick recently.
samar@Techgaun:~$ cat /etc/sudoers
cat: /etc/sudoers: Permission denied
samar@Techgaun:~$ sudo !!
sudo cat /etc/sudoers
[sudo] password for samar:
*** Content Snipped to preserve length ***
cat: /etc/sudoers: Permission denied
samar@Techgaun:~$ sudo !!
sudo cat /etc/sudoers
[sudo] password for samar:
*** Content Snipped to preserve length ***
As shown above, the !! is just another event designator. The !! actually holds the last used command and this can be alternatively specified as !-1. The !-1 version can be actually generalized to traverse back to history i.e. you can get any command in your history by using !-n convention.
4) The Clean up Terminal trick: Sometimes you open the binary and gibberish data and your terminal looks so ugly and needs some cleanup. In such cases, the command reset can be used which actually does is initialize the terminal.
5) Run previous command by replacing one string with another: Using the syntax ^abc^xyz^, you can run the previous command by replacing the string abc by the string xyz. The example below shows how I used the cat command after using the ls command. Its just an example, you could really make use of this trick for longer commands.
samar@Techgaun:~/Desktop$ ls /etc/hosts
/etc/hosts
samar@Techgaun:~/Desktop$ ^ls^cat^
cat /etc/hosts
/etc/hosts
samar@Techgaun:~/Desktop$ ^ls^cat^
cat /etc/hosts
Read more...
Bookmark this post: |
|
Sunday 12 February 2012
Determine All Internet Connections And Corresponding Running Processes In Linux [How To]
Sometimes you might want to see all the internet connections being made by the running processes in the linux system. I am writing this small commandline trick to view all the internet connections using the lsof command.
lsof command is used to all the open files and the processes opening those files. All kind of resources such as disk, network connections, pipes, etc. are actually implemented as files in linux and the lsof command allows you to get the report regarding the opened files.
To view all the internet connections and the corresponding processes, we can simply use the -i switch as below:
The above command runs fine but is a little bit slow since it tries to resolve the network addresses to host names and port numbers to port names. So you might wish to use the command below for faster response from the lsof command.
Also, running the lsof command as the root(i.e. sudo lsof | grep -i listen or sudo lsof -i | grep -i listen) will give more extra outputs esp. the "LISTEN" ones i.e. the processes that are listening for incoming connections. This piece of information might be useful in determining the backdoors and rootkits but I've not yet explored into that.
I hope this little trick comes useful sometimes.
Read more...
lsof command is used to all the open files and the processes opening those files. All kind of resources such as disk, network connections, pipes, etc. are actually implemented as files in linux and the lsof command allows you to get the report regarding the opened files.
To view all the internet connections and the corresponding processes, we can simply use the -i switch as below:
samar@Techgaun:~$ lsof -i
The above command runs fine but is a little bit slow since it tries to resolve the network addresses to host names and port numbers to port names. So you might wish to use the command below for faster response from the lsof command.
samar@Techgaun:~$ lsof -i -Pn
Also, running the lsof command as the root(i.e. sudo lsof | grep -i listen or sudo lsof -i | grep -i listen) will give more extra outputs esp. the "LISTEN" ones i.e. the processes that are listening for incoming connections. This piece of information might be useful in determining the backdoors and rootkits but I've not yet explored into that.
I hope this little trick comes useful sometimes.
Read more...
Bookmark this post: |
|
Saturday 28 January 2012
KDE Version 4.8 Is Released With Updated Plasma Workspaces, Apps n Platforms
On 25th January 2012, KDE has released 4.8.0, containing compelling new features and improvements to the Plasma Workspaces, the KDE Applications and the KDE Development Platform. Version 4.8 is intended to provide many new features, and improved stability and performance.

Major KDE improvements in this version are:
Adaptive Power Management - Kwin optimizations, the redesign of power management, and integration with Activities.
Faster, More Scalable File Management - KDE v. 4.8 includes Dolphin with its new display engine, new Kate features and improvements, Gwenview with functional and visual improvements.
Enhanced Interoperability & Introduction of Touch-Friendly Components
Check the official announcement
Read more...
Bookmark this post: |
|
Monday 16 January 2012
Things I Use CLI Rather Than GUI For
Today I am sharing the things I do not use or do not like to use graphical user interface(GUI) instead I stick to command line. I use the following commands instead of their graphical counterpart as the command line way is faster and easier.
1) Combine MP3 files(songs)
I frequently combine mp3 files into a single one to hear what I record in my laptop. The cat command is enough to combine two or more MP3 files into a single one. Below is a sample command:
2) Monitor Memory Usage
I usually find myself typing top command in the terminal instead of opening system monitor when I need to see what is clogging up my CPU. I also use powertop command to view power consumption of my laptop so that I can get suggestions to increase the battery life.
3) Resize images
This is another thing I use command line instead of GUI, for. I find using the mogrify and convert commands from imagemagick packages easier than graphical interface esp. when I need to batch resize the images to a specified size. Please refer to my blog post in these commands.
4) Video Conversion Using ffmpeg
I frequently convert the videos using the commandline ffmpeg utility. The general syntax is quite easier to remember. An example below will clarify things.
Play with different video formats as per your requirement.
5) Edit Text Files
I usually find myself opening nano editor while editing the text files. Of course, using the lightweight GUI tools like gedit would be more easier and reliable. However, maybe due to the fact that I work a lot of times over SSh, I find using nano to edit textual files.
6) Install Softwares and Perform Updates and Upgrades
Whenever I need to install a software, or perform updates and upgrades, I am used to with the command line apt-get utility.
Install a software package
Perform release upgrade
7) Mirror A Website
Mirroring a website is a lot easier with wget command and I frequently use this. The simplest form is as below but be sure to check the MAN page and help for wget command to know more options available.
In the above example, m means mirror and k refers to local hyperlinking and w is for maintaing proper delay time so that the remote server does not get overloaded.
So these are some of the stuffs I like to do using command line rather than GUI. Share yours...
Read more...
1) Combine MP3 files(songs)
I frequently combine mp3 files into a single one to hear what I record in my laptop. The cat command is enough to combine two or more MP3 files into a single one. Below is a sample command:
cat input1.mp3 input2.mp3 > output.mp3
2) Monitor Memory Usage
I usually find myself typing top command in the terminal instead of opening system monitor when I need to see what is clogging up my CPU. I also use powertop command to view power consumption of my laptop so that I can get suggestions to increase the battery life.
3) Resize images
This is another thing I use command line instead of GUI, for. I find using the mogrify and convert commands from imagemagick packages easier than graphical interface esp. when I need to batch resize the images to a specified size. Please refer to my blog post in these commands.
4) Video Conversion Using ffmpeg
I frequently convert the videos using the commandline ffmpeg utility. The general syntax is quite easier to remember. An example below will clarify things.
ffmpeg -i inputvideo.mp4 outputvideo.avi
Play with different video formats as per your requirement.
5) Edit Text Files
I usually find myself opening nano editor while editing the text files. Of course, using the lightweight GUI tools like gedit would be more easier and reliable. However, maybe due to the fact that I work a lot of times over SSh, I find using nano to edit textual files.
nano file.txt
6) Install Softwares and Perform Updates and Upgrades
Whenever I need to install a software, or perform updates and upgrades, I am used to with the command line apt-get utility.
Install a software package
sudo apt-get install package1 package2 ... packagen
Perform release upgrade
sudo do-release-upgrade
7) Mirror A Website
Mirroring a website is a lot easier with wget command and I frequently use this. The simplest form is as below but be sure to check the MAN page and help for wget command to know more options available.
wget -mk -w 4 http://www.site.com/
In the above example, m means mirror and k refers to local hyperlinking and w is for maintaing proper delay time so that the remote server does not get overloaded.
So these are some of the stuffs I like to do using command line rather than GUI. Share yours...
Read more...
Bookmark this post: |
|
Subscribe to:
Posts (Atom)